Friday, June 30, 2023

Sling shots

It's not what you're thinking. 

Though my name is David, my target is not Goliath, and this has nothing to do with stones.

It's about my slings.

No... I didn't break or sprain my arm.

I'm talking sling bags.

My first sling bag

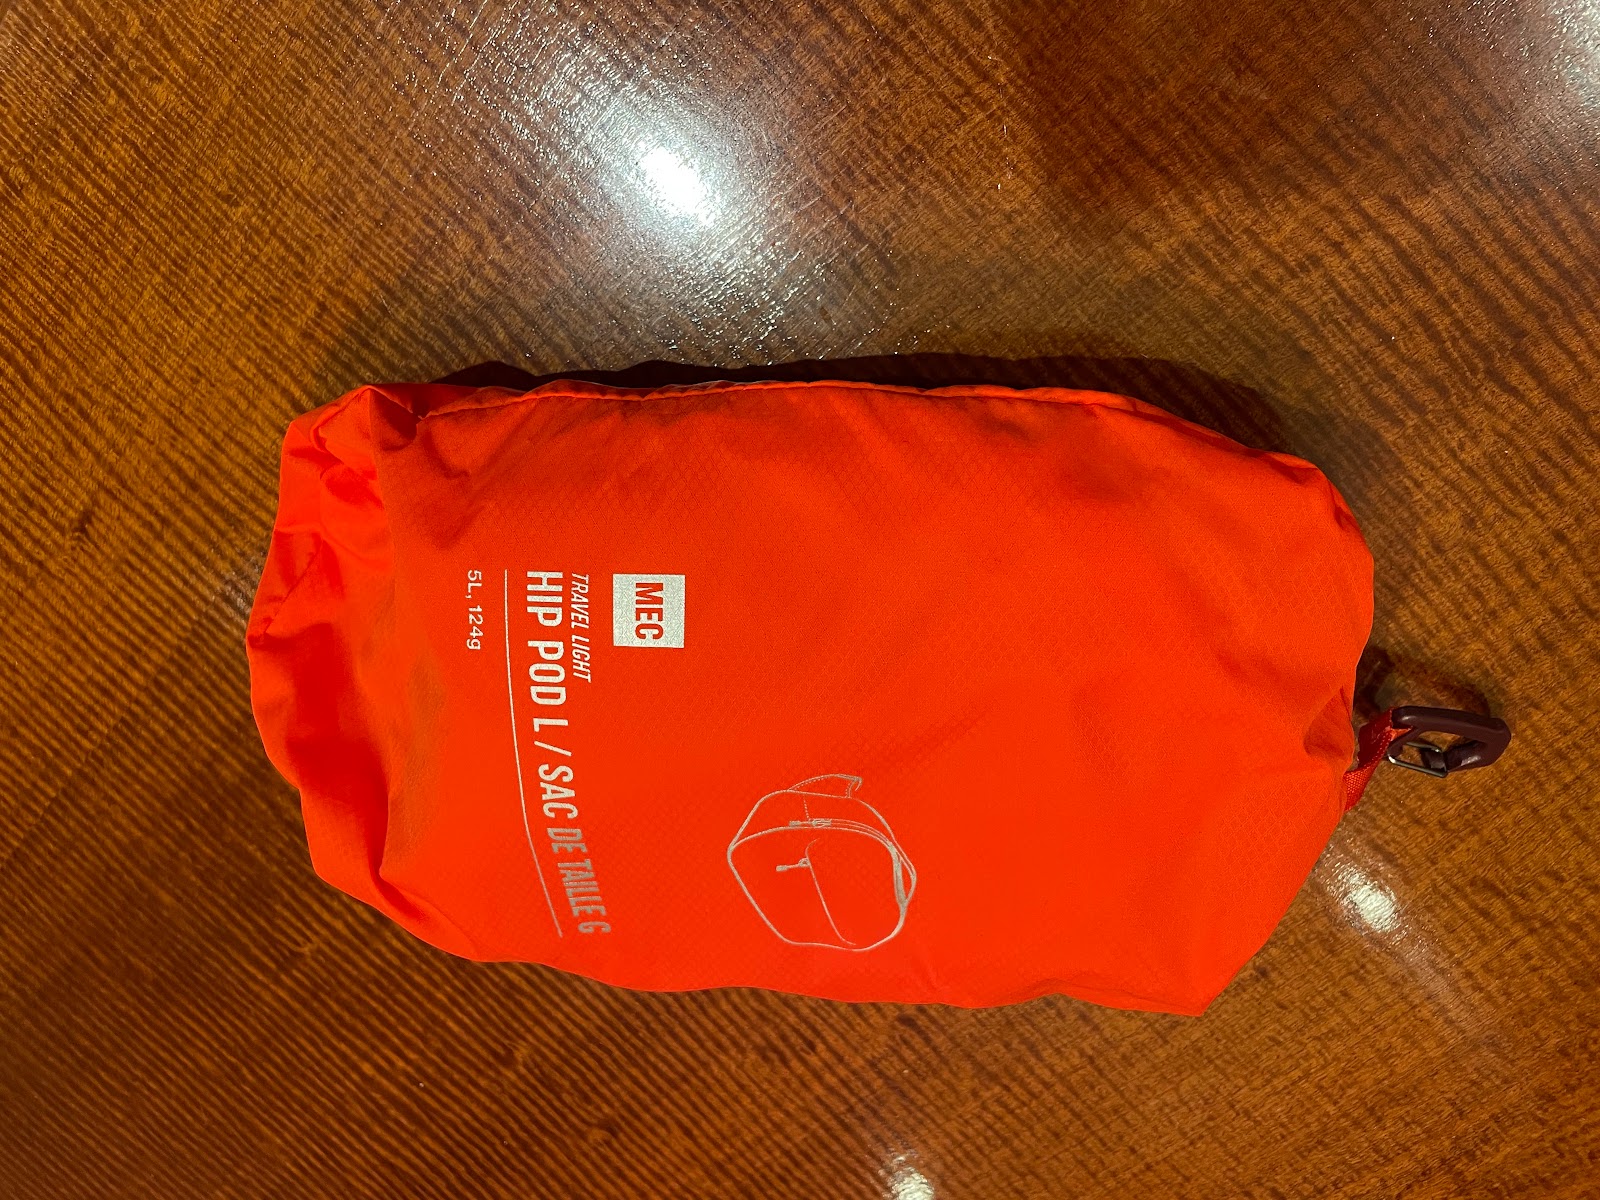
Before our trip to France last year I picked up a very basic sling/waist bag from Mountain Equipment Coop. It did the trick for our trip and it also worked well for bike rides.

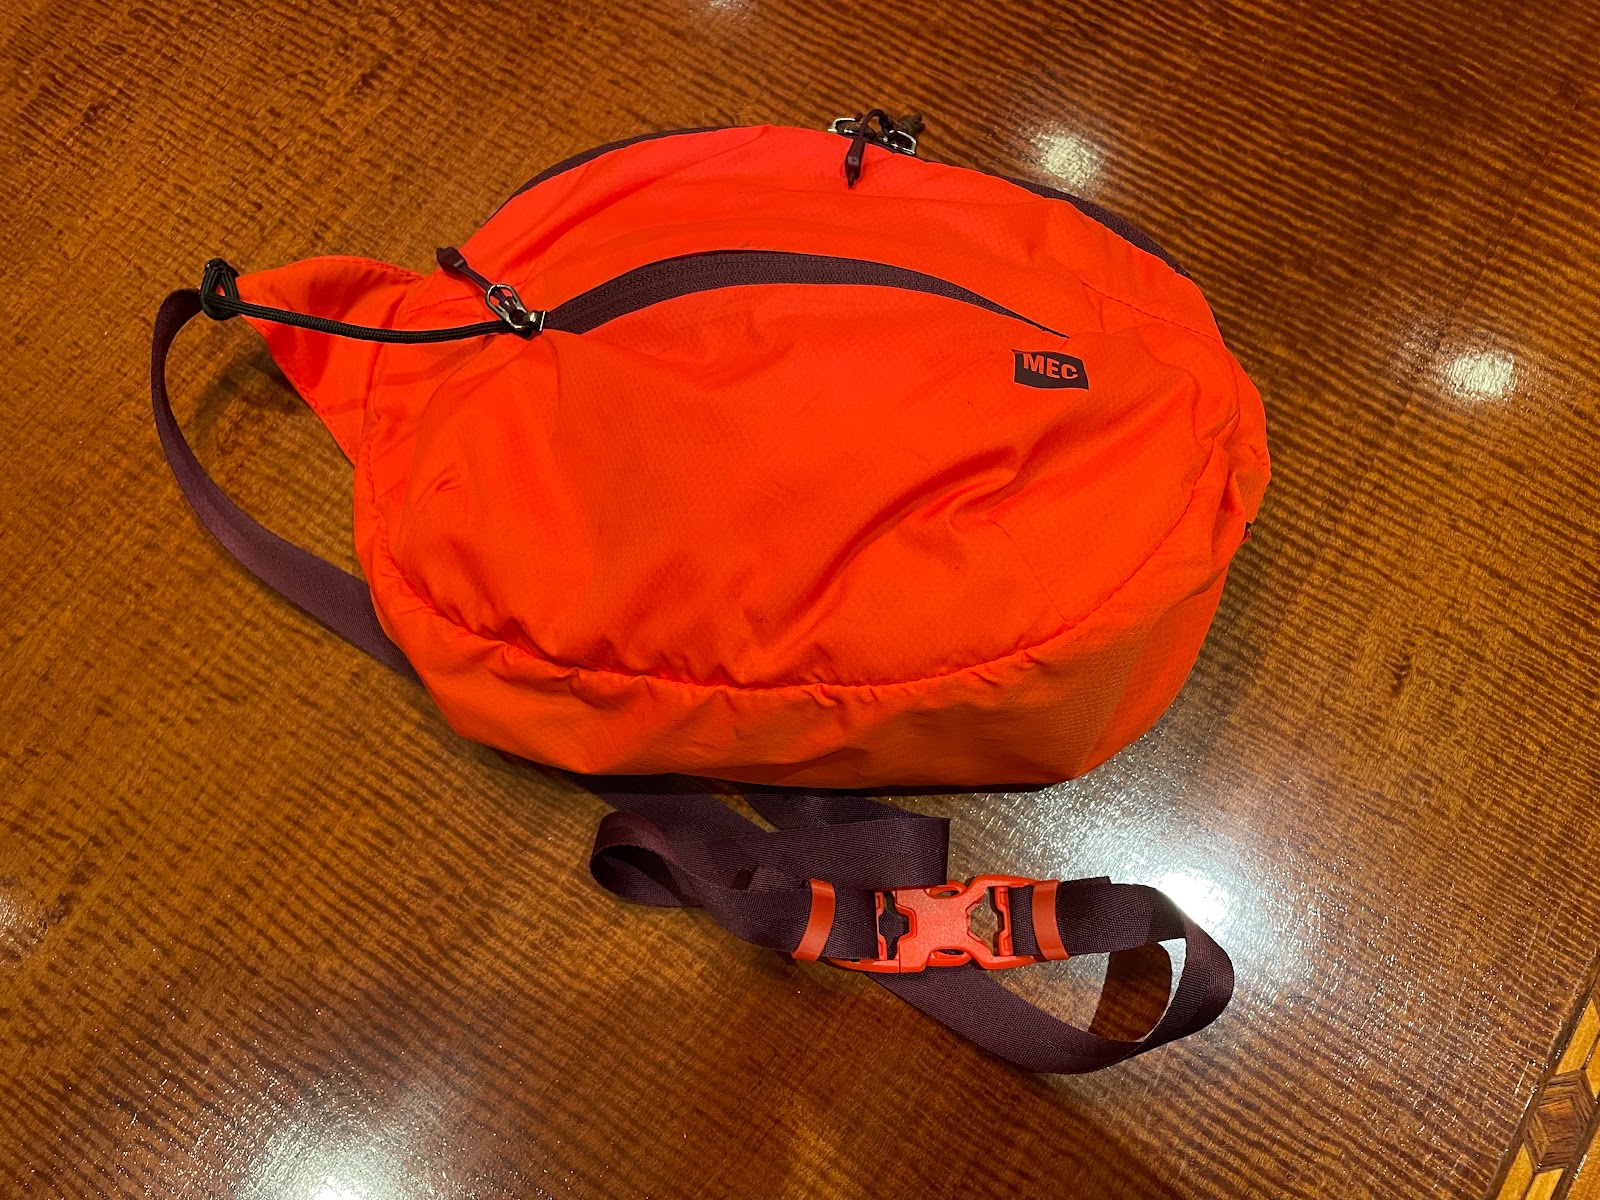
What I don't much like about it:

a) the strap is too thin

b) the bag is ORANGE. Definitely not something that will pass unnoticed, and somewhat unlikely to match whatever it is you're wearing, even if you work in construction or for the fire department.

What I do like about it:

a) it's maybe the lightest of all slings on the market.

b) it folds into itself and zips up, so when not in use it takes up very little room. It's very packable.

c) it can hold the jackets I take on all our trips:

        i) my super-packable, scrunchable, minimalist Uniqlo semi-water-resistant wind breaker.

        ii) my very packable, scrunchable, Uniqlo featherweight down jacket.

        iii) my packable, wind proof, and super-waterproof, Arc'Teryx jacket.

Those jackets, and, depending on the weather, wearing all three at once, will keep you comfortable whether it's an unexpected slightly too cool summer evening breeze, a sudden rain storm, or out-of-the-blue frigidly cold winter-like weather. I like to be prepared.

d) it can also hold, at the same time as a jacket or even two of those jackets, my phone, and my camera.

It did the trick in France last year. When we got caught in rainy weather way up in Montmartre at the Sacré Coeur basilica, I just pulled my Arc'Teryx jacket out of my sling and it kept me nice and dry as we strolled down to the equally iconic Galeries Lafayette department store, several kilometres away, to grab a bite to eat, and to do some shopping. 


Not bad at all, but not perfect.

My research continued.

We're off to Spain and Portugal in the fall and I wanted to see if I could find an even better solution. Perhaps one that I could use daily, rather than only when traveling, hiking, and biking.

My new sling bag

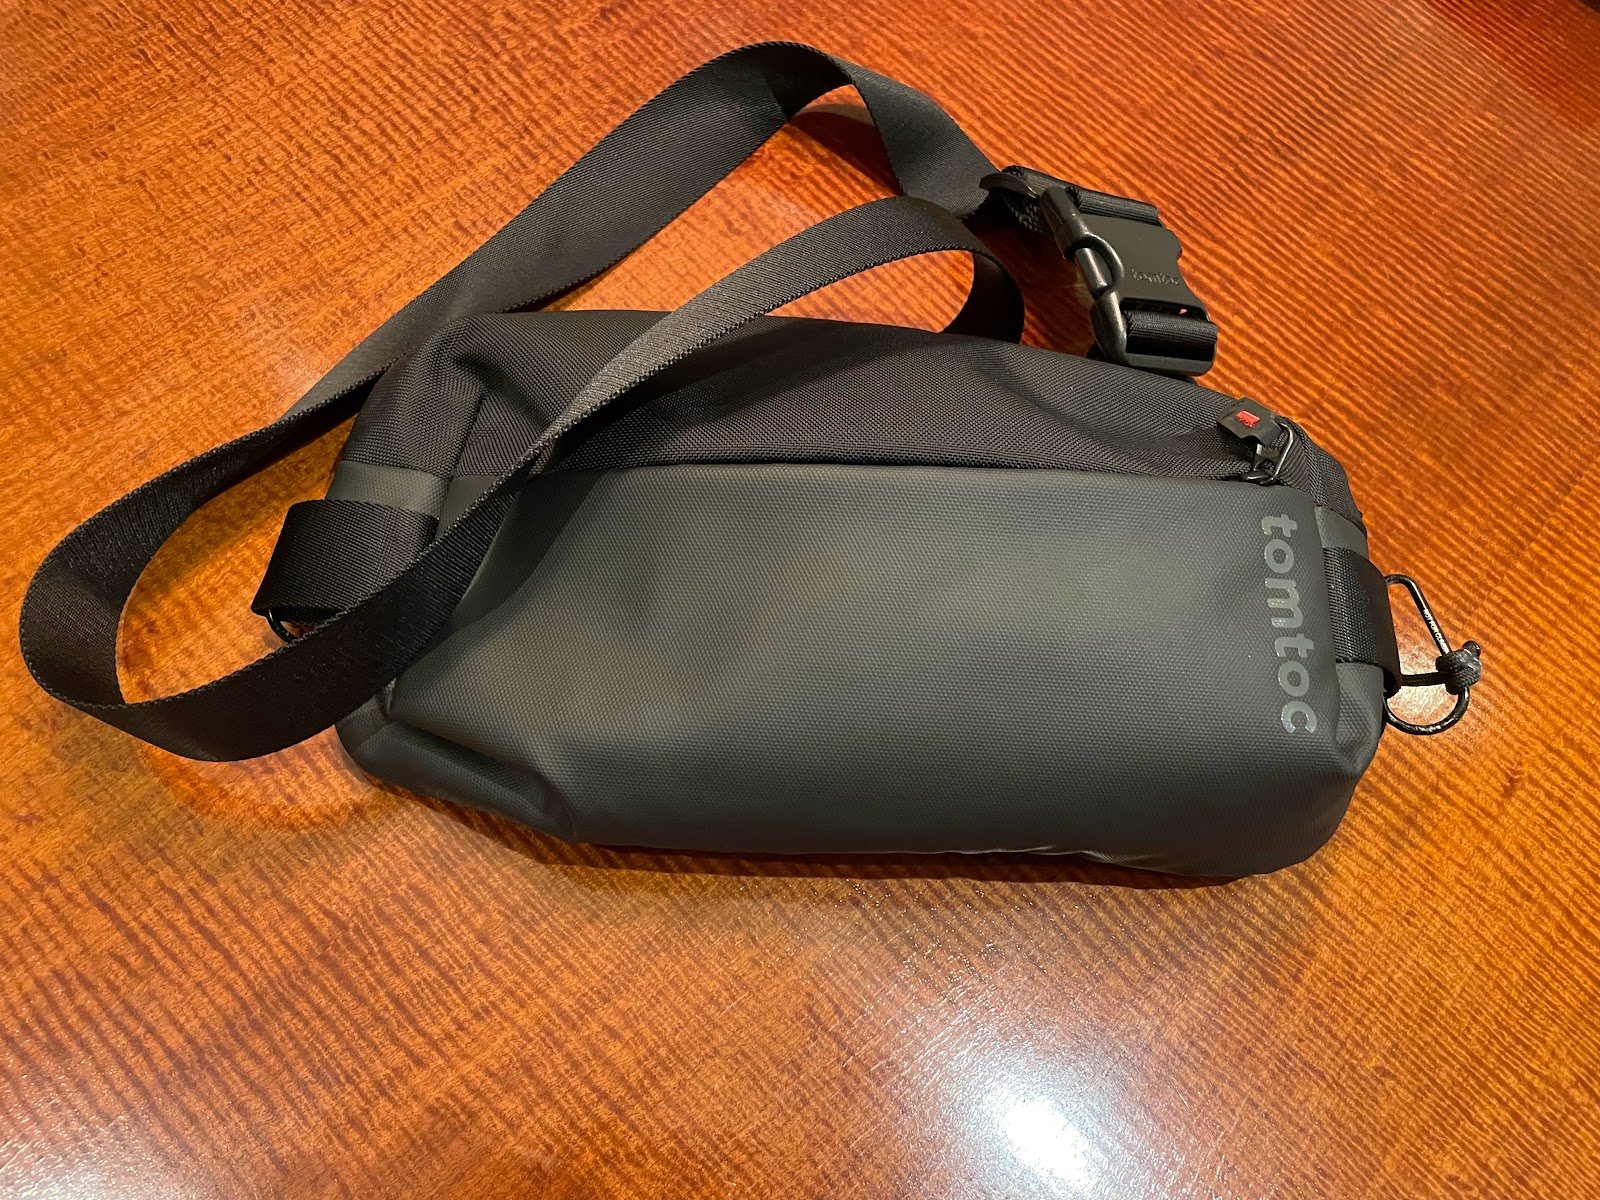
I went out on a limb and purchased a Tomtoc EDC sling bag.


It has a lot going for it.

a) it's not ORANGE. It's black.

b) the strap is nearly seatbelt-wide, and comfortable.

c) it's compact, but it can still hold any one of my jackets, plus my keys, my wallet, my sunglasses, my phone, my AirPods, and my camera. And there still some room left over for a few other odds and ends, like theatre tickets. Yay!

And yet, nothing is perfect.

Taming the drift

The ORANGE one drifts more. The Tomtoc drifts less. It drifts less due to the smart design of the strap and its anchor points.  Yet drift it does.

What is sling drift?

Every sling has a place where it likes to be. You can find that place by wearing the sling and walking a kilometre or so. If you resist the temptation to tug and poke, the sling will find its happy place all on its own. 

I can more or less guarantee that wherever that place may be, it's not a place you'll like having the sling.

If you're riding a bike the sling will begin taunting your thigh with each pedal rotation. Bump, bump, bump, bump, bump... Ya, that's annoying.

If whatever it is you're doing makes it necessary to bend forward, like folding or unfolding your Brompton bike, the sling will jump for joy and swing into action, gleefully interfering with whatever it is you're trying to do... Ya, that's annoying.

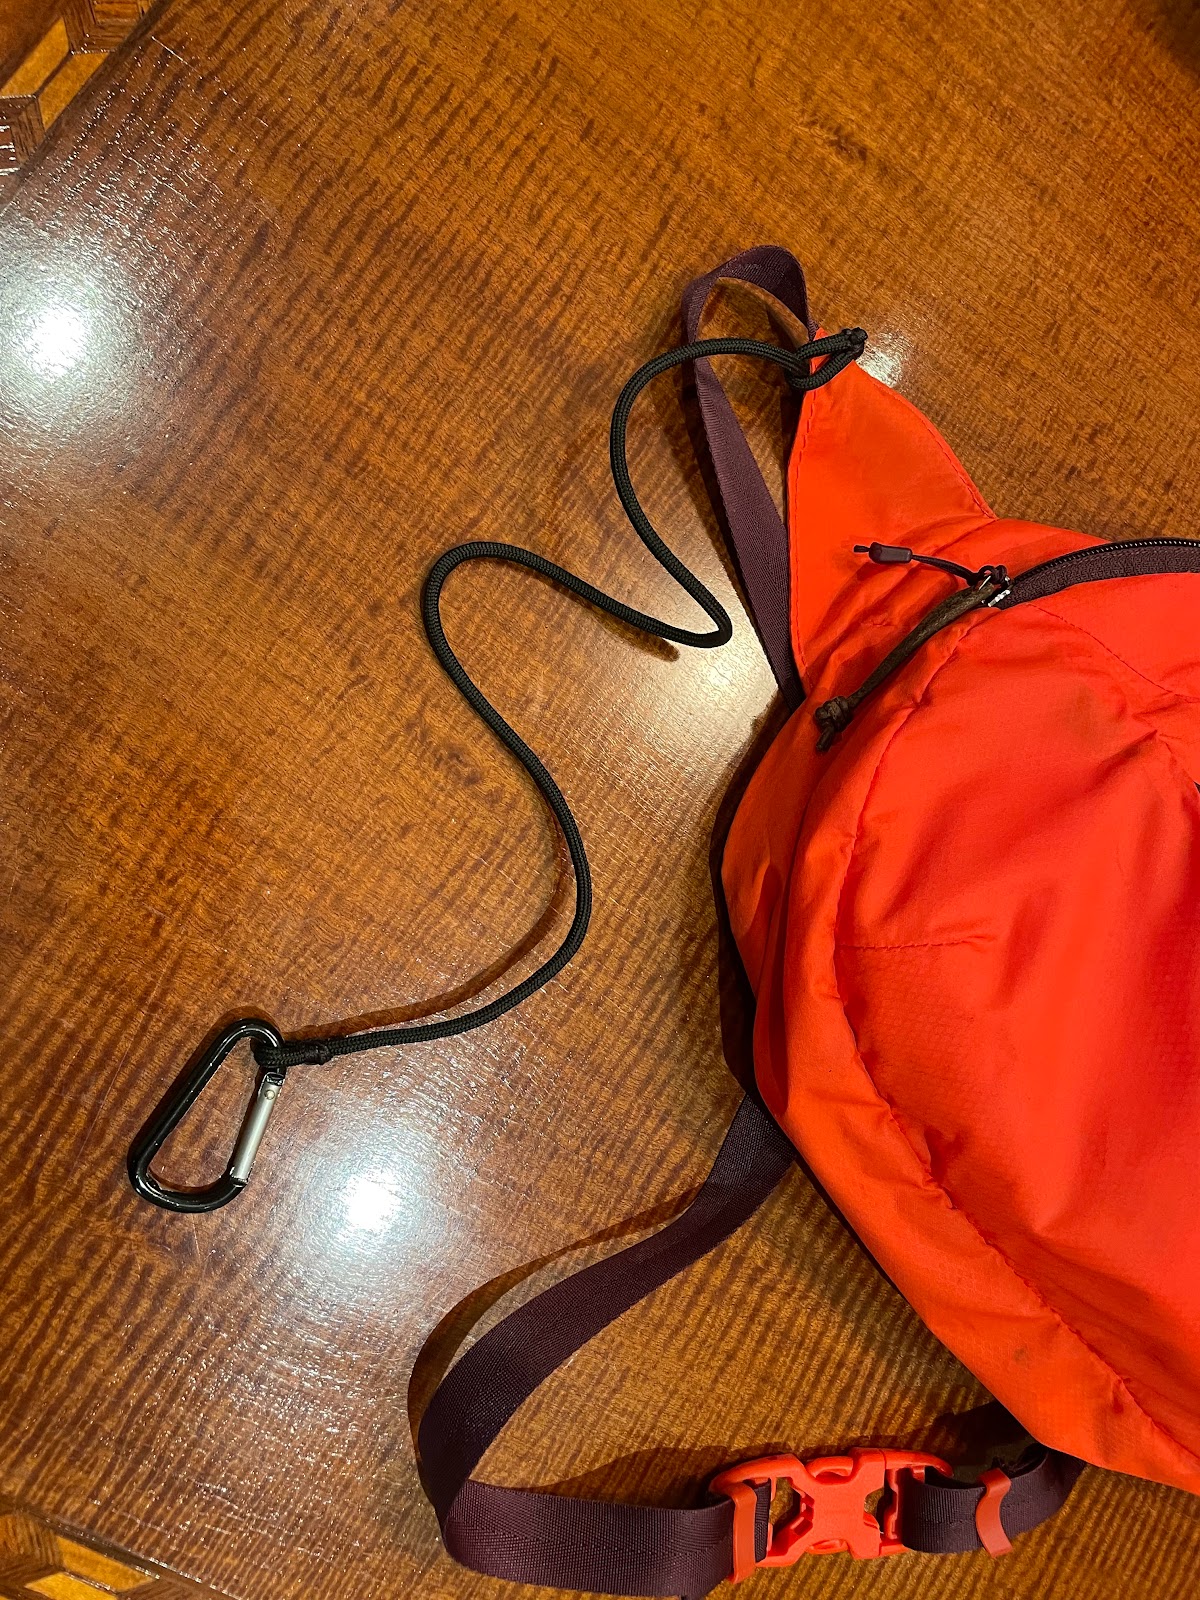
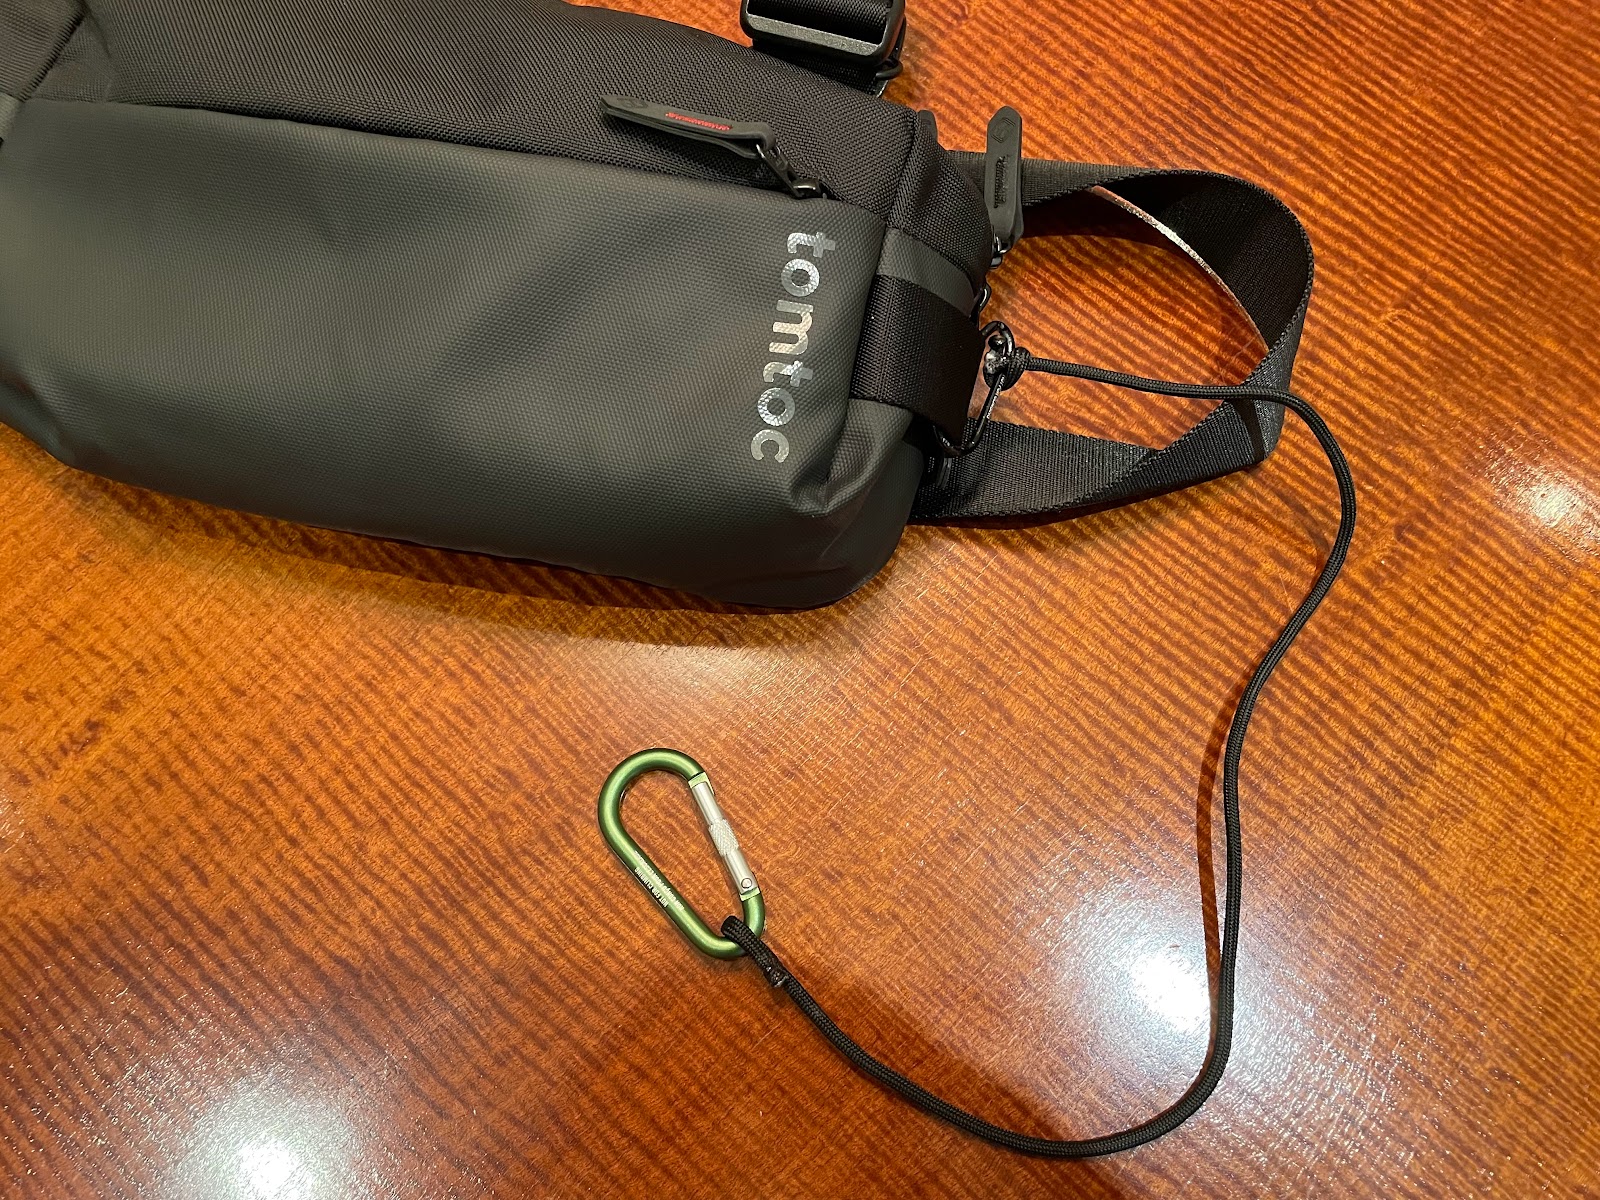
The drift fix is pretty easy. Just like a loyal loving pooch, your sling needs a leash.

Here's my leash trick:

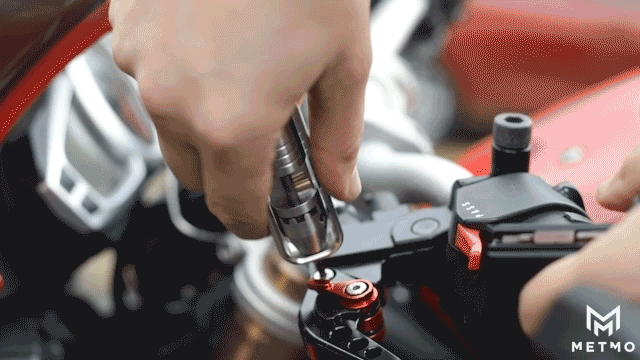
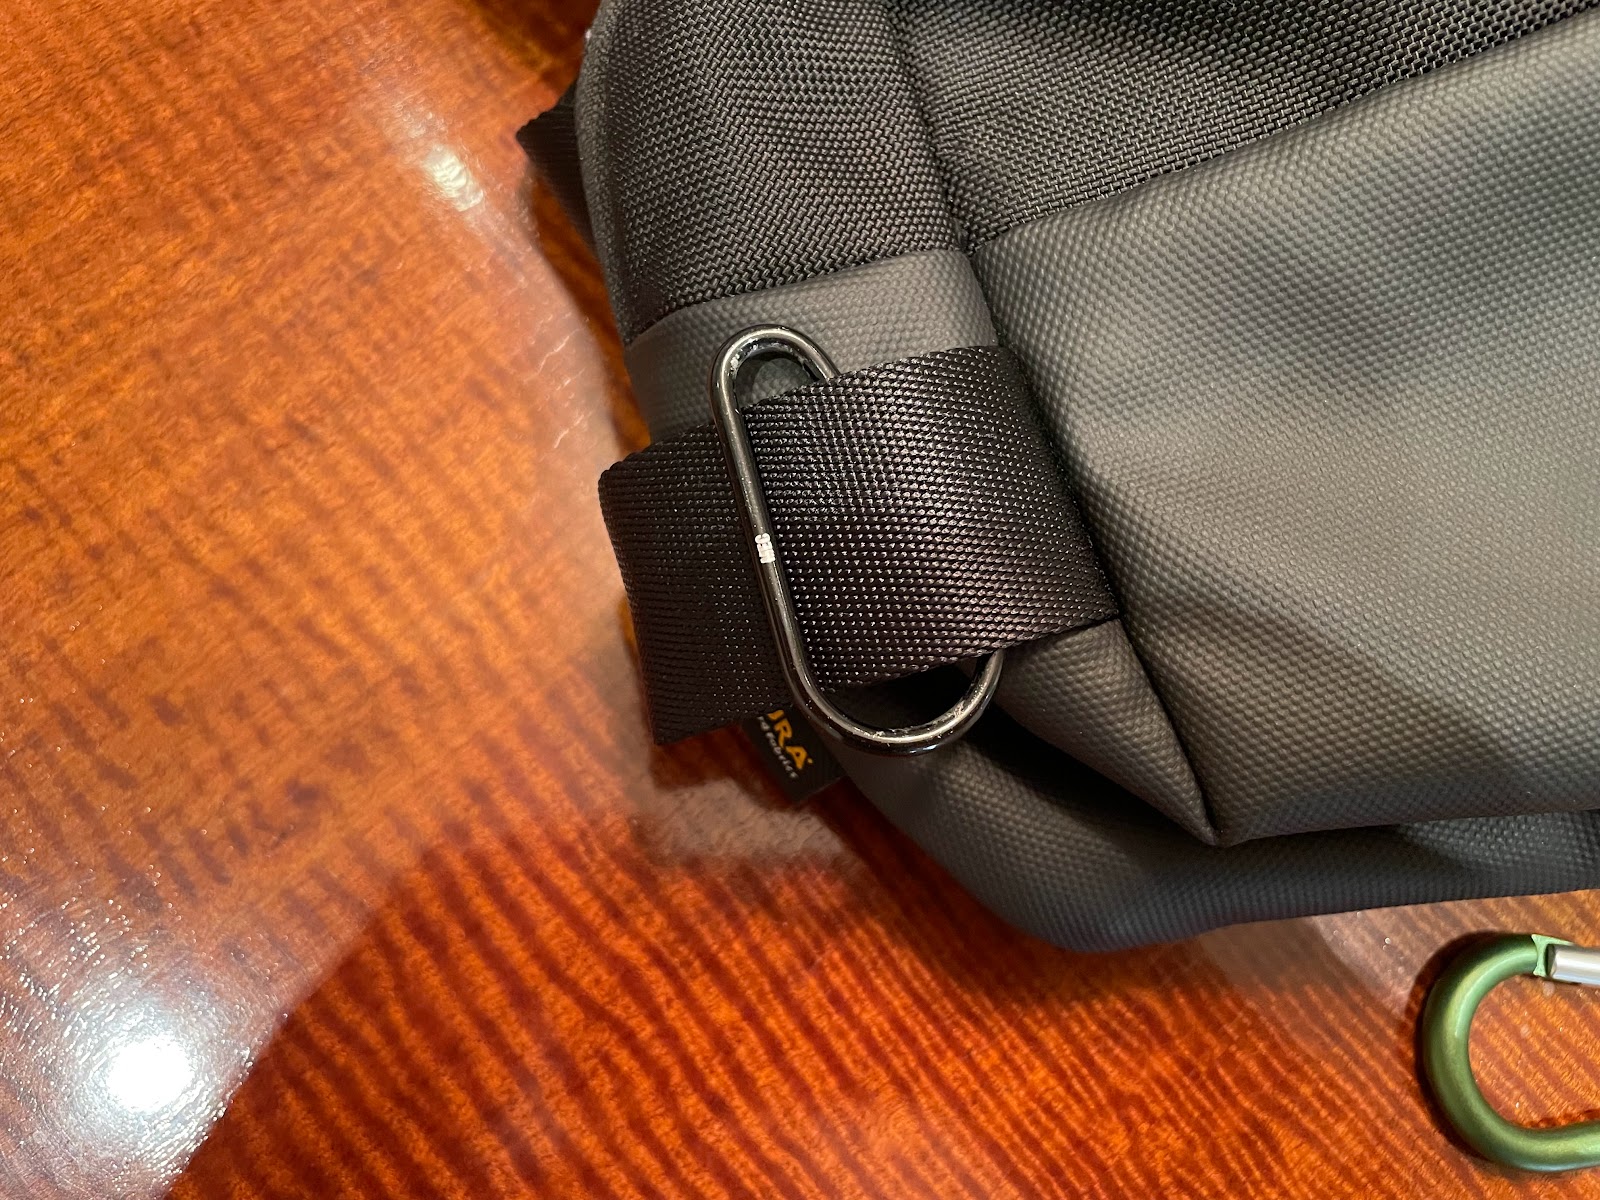
Get a short length of paracord and a small carabiner. Sew a small loop at one end of the paracord and attach the carabiner to it. Clip the carabiner to a belt loop opposite the side where the sling sits. Find an attachment point on the sling bag, for the ORANGE sling it's the strap where it meets the bag, for the Tomtoc it's at the end of the bag where there's an attachment loop; measure the required length of the leash you are making, cut the cord to that length allowing for sewing a second loop, use that loop to attach the leash to the bag (feed the leash around the attachment point and feed the other end through the loop you made), clip the other end of the leash to the belt loop that works best, and just like that you have tamed the sling drift. When the leash isn't needed, just tuck it into the sling.


Clipping keys

We have two cars with remotes, and a garage door control fob that also opens the main lobby door, and the door from the garage to the elevator lobby. That means that the garage fob needs to stay handy. Just leaving it in the car isn't really an option.

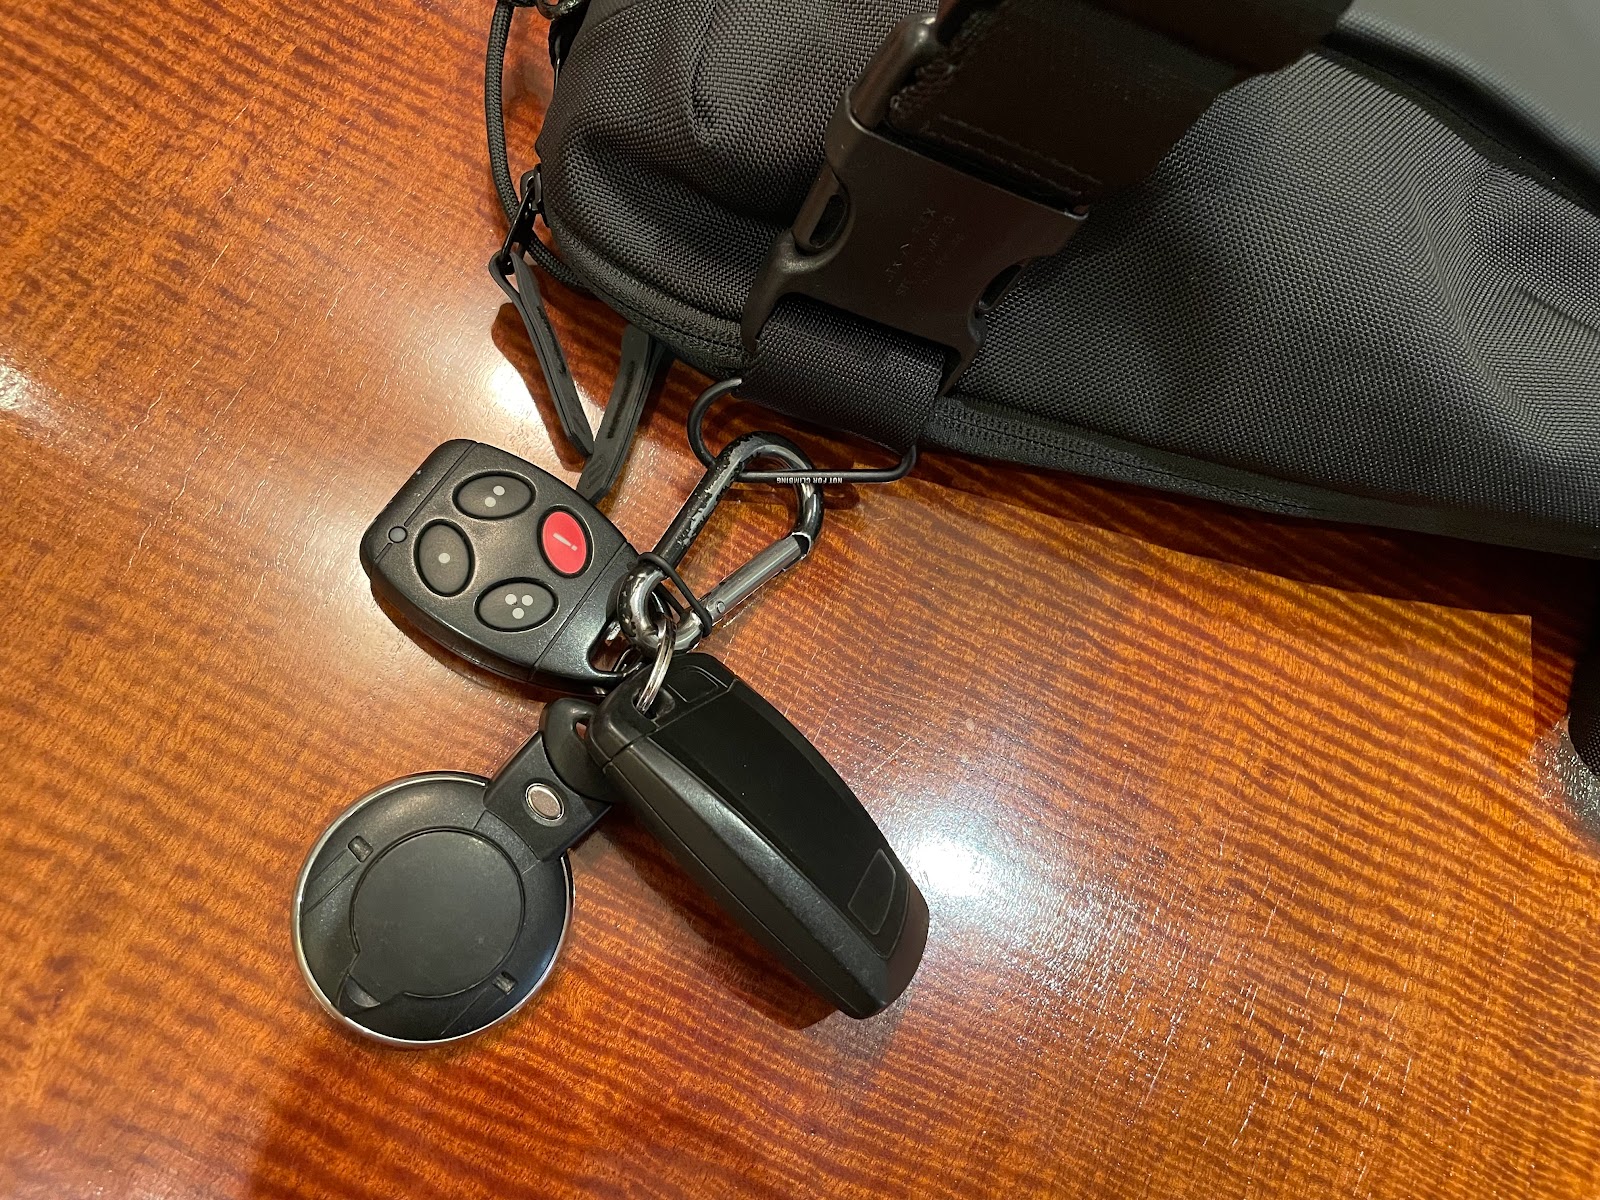
Keeping keys and fobs handy is simple. Clip them to the outside of your sling.

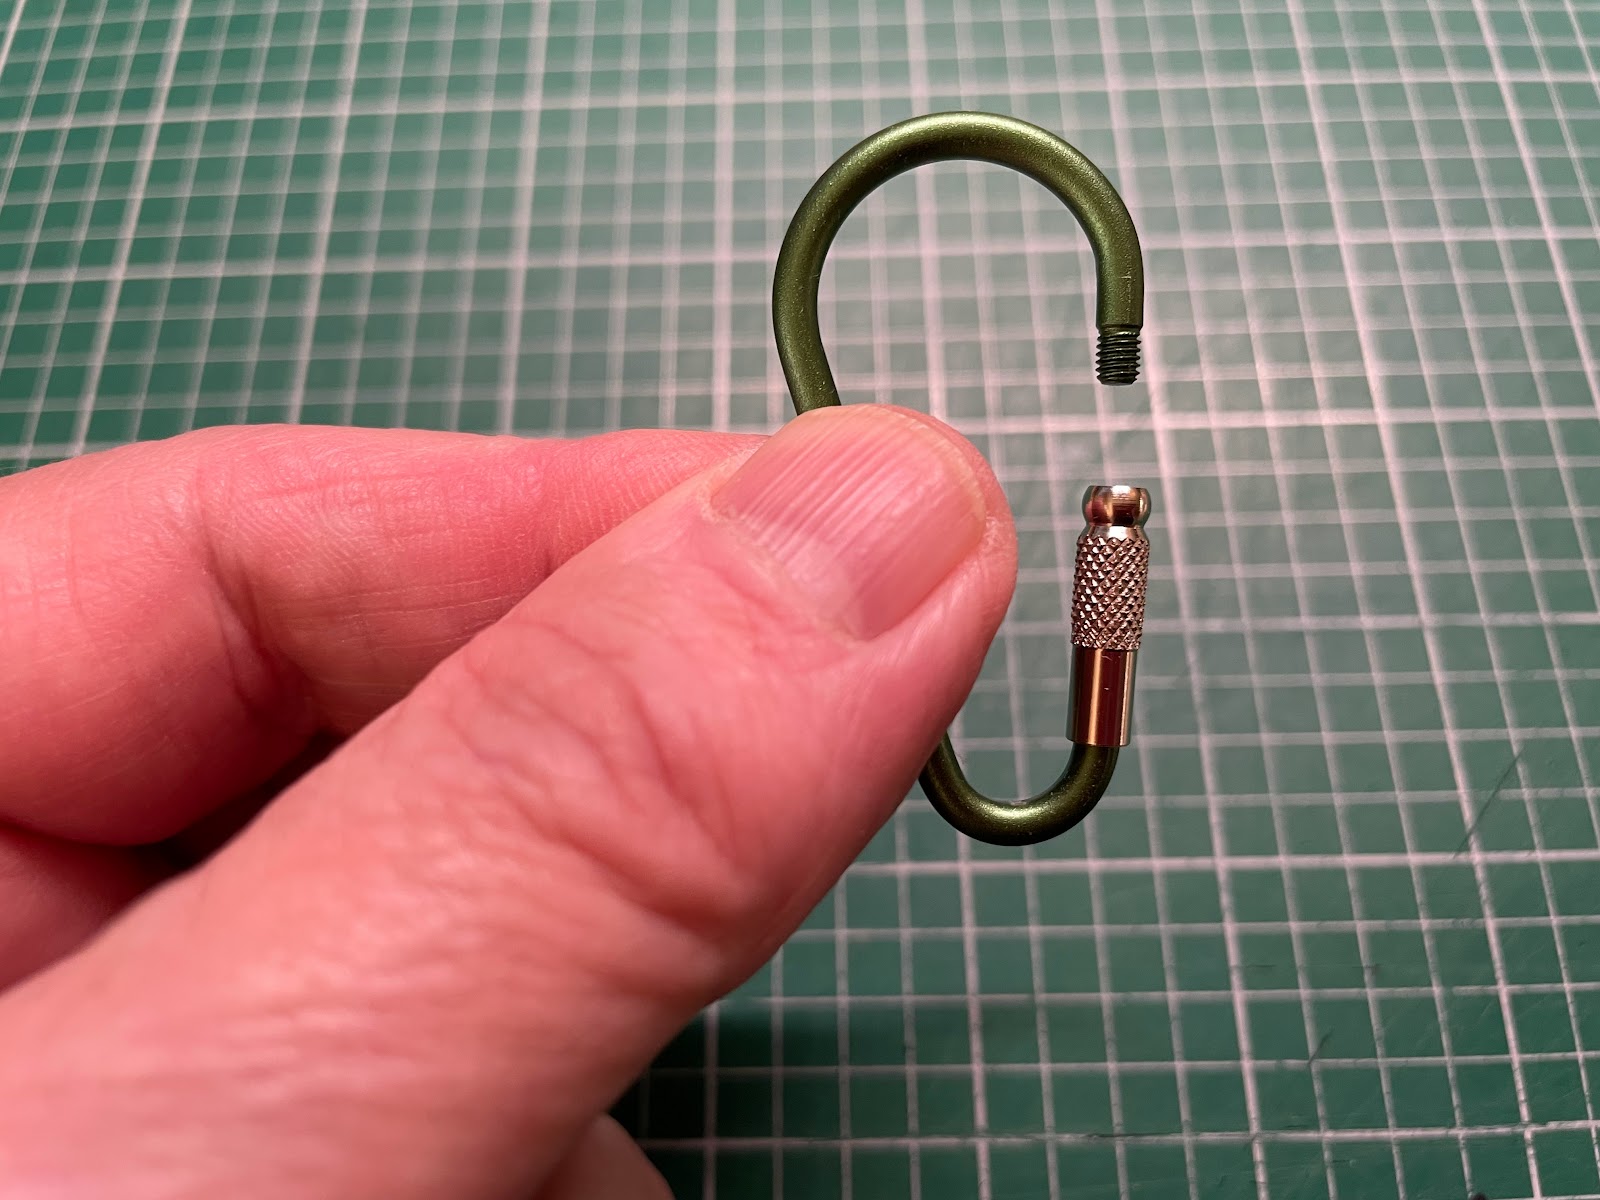
Instead of a traditional key chain, I use a carabiner and a key ring for the car and garage door remotes. 

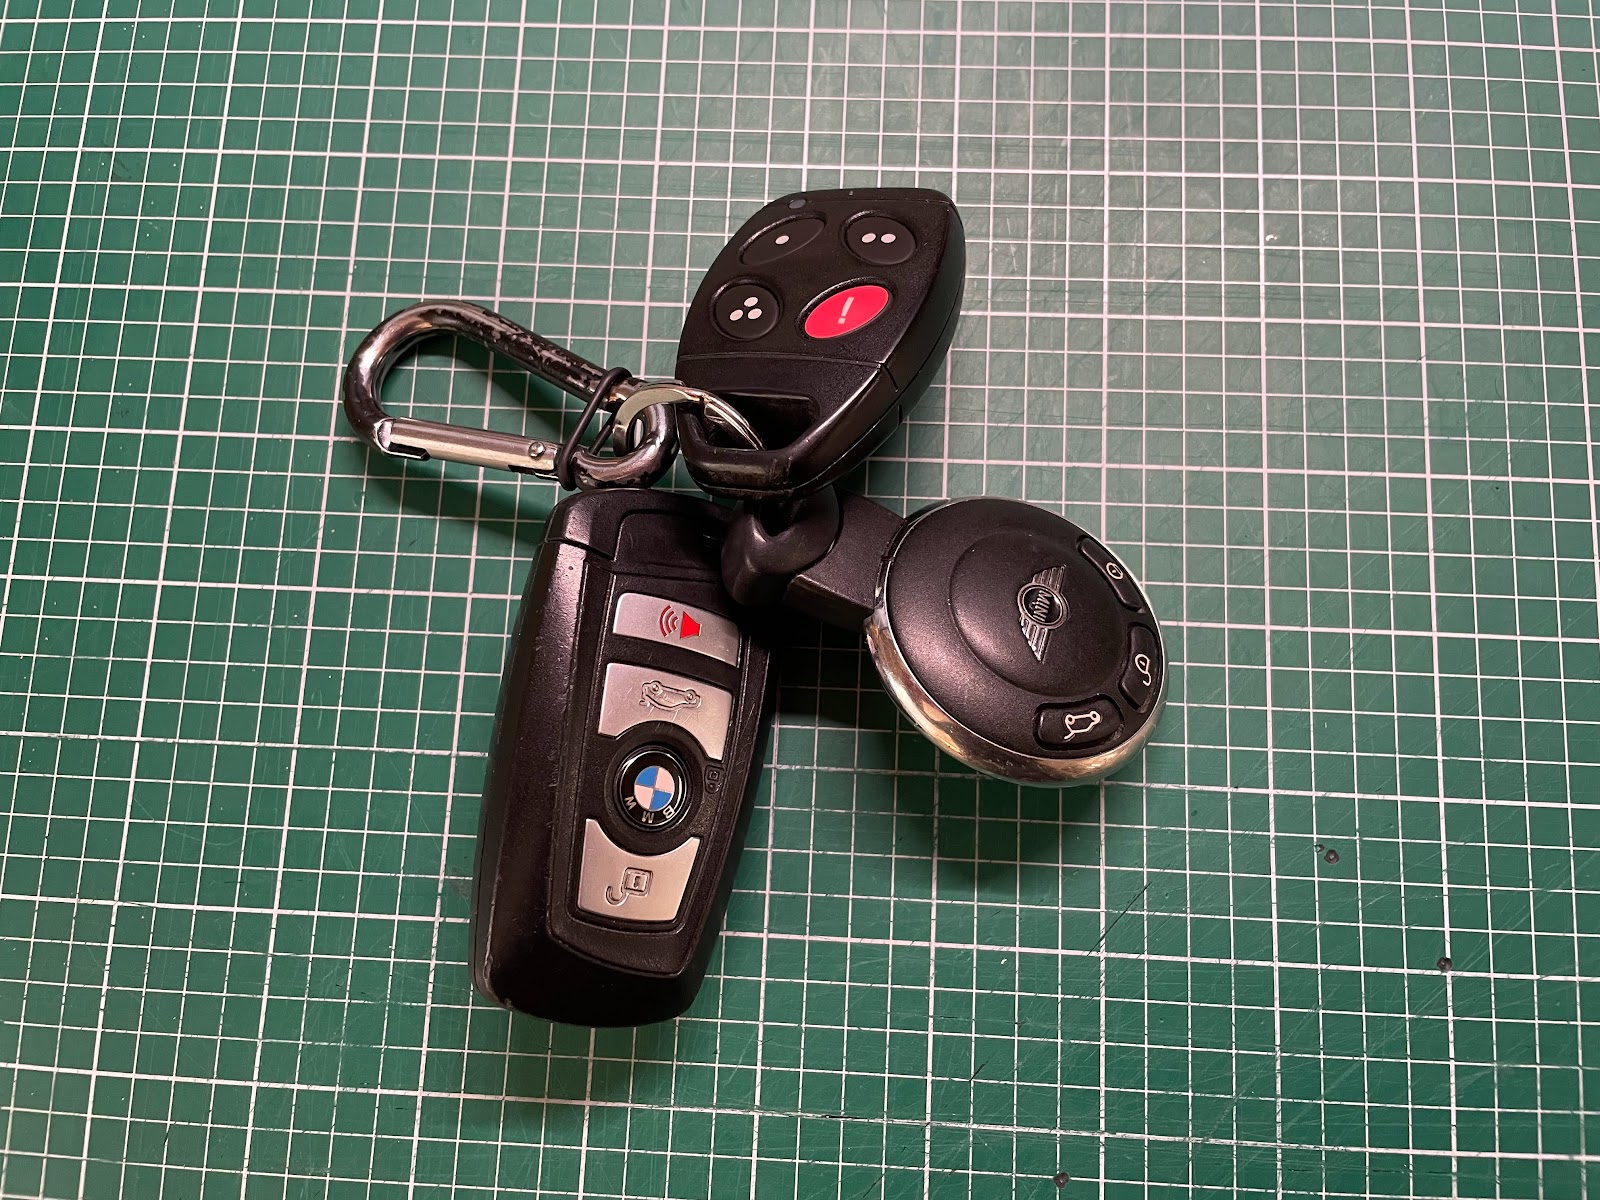
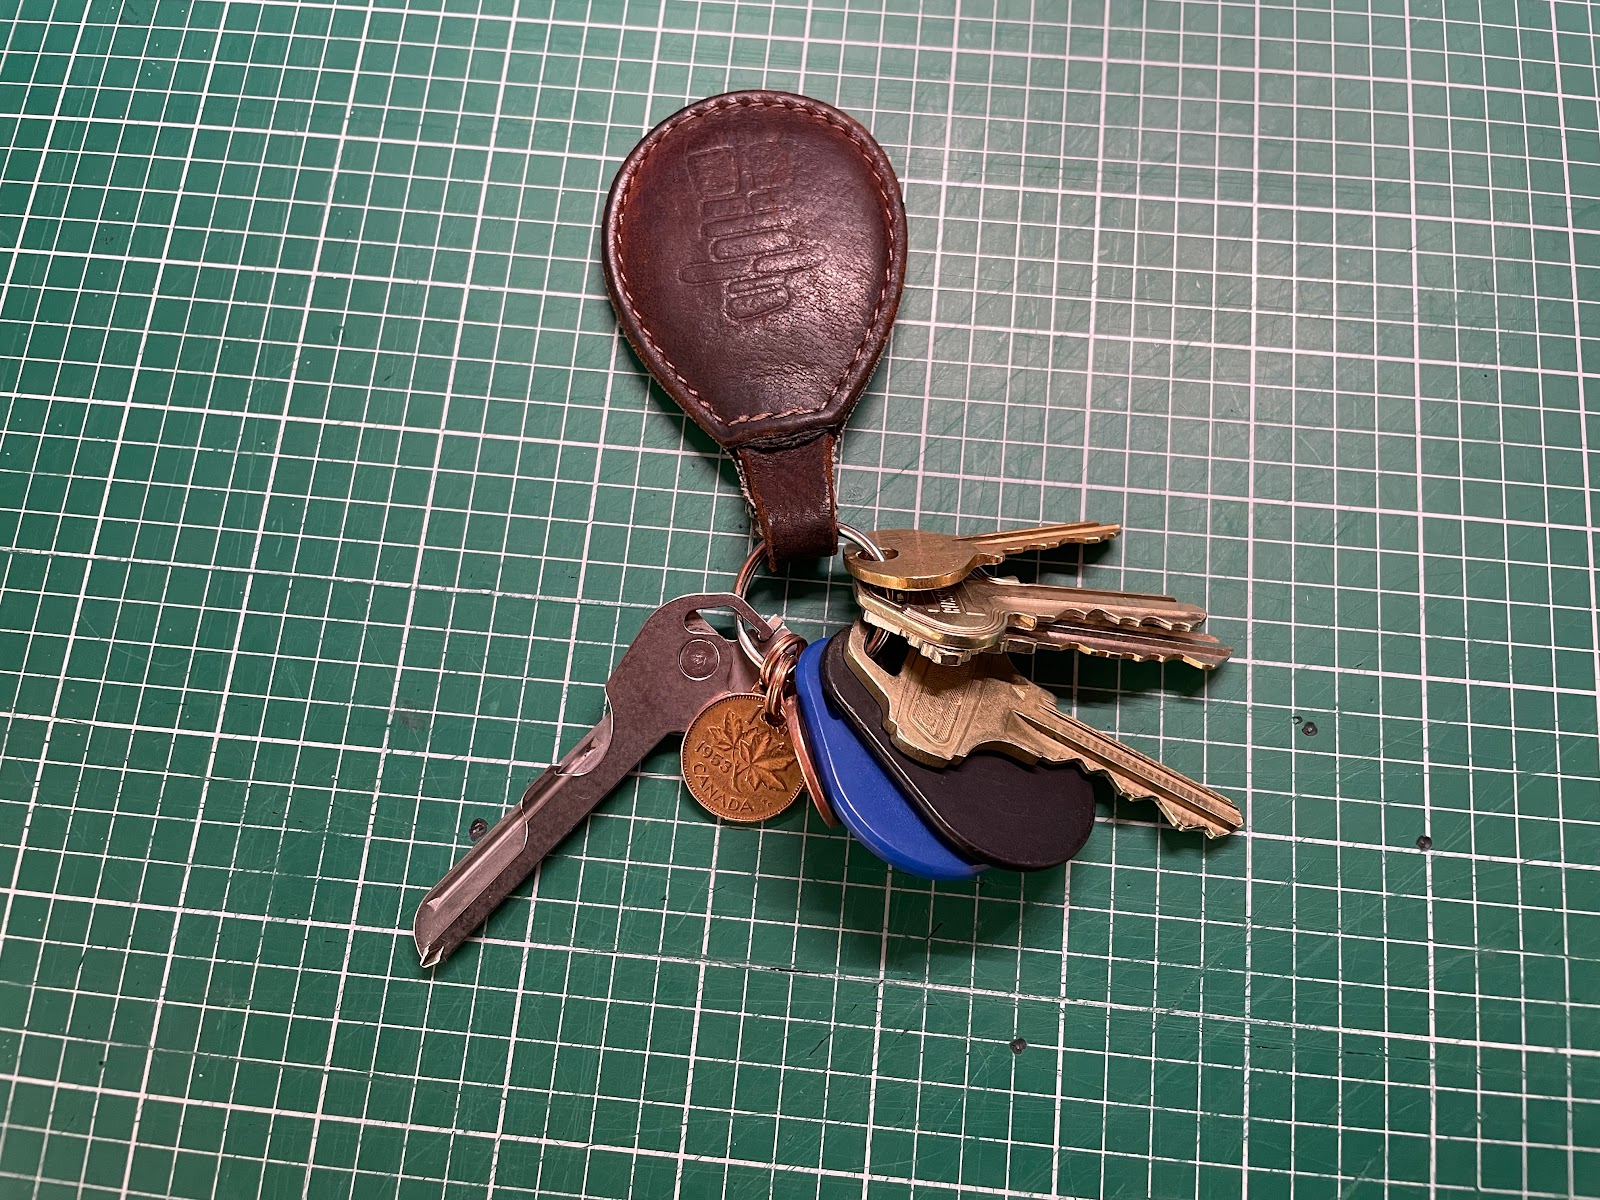
I use a more traditional key chain for the other keys (in my case that's a bunch: our townhouse key, the locker room key that also opens other keyed locks in the condo building, the key to the padlock on our locker, and the mailbox key.

I use the carabiner to clip the key chain to the car and garage remotes. I hang my keys on a hook in the closet. That keeps them handy and all in one place.


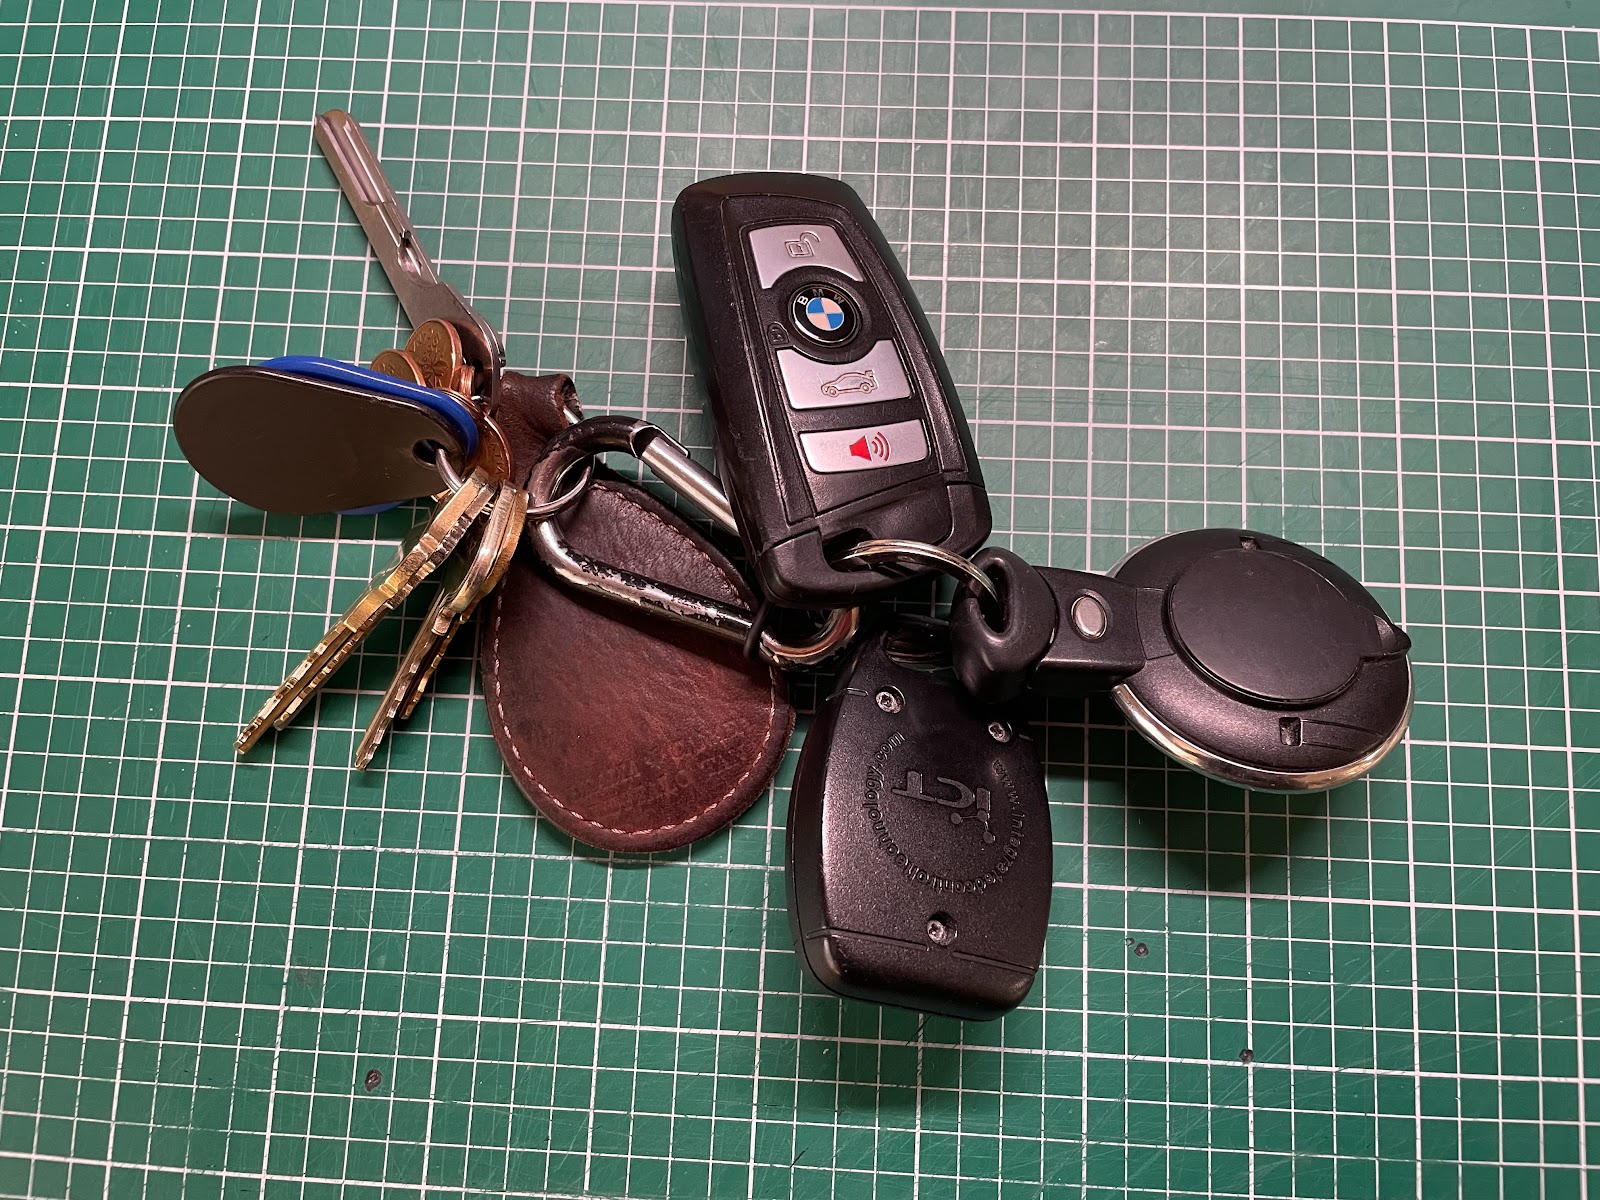
When you go out and about, unclip the key chain, lock the front door and toss those keys in the sling. Clip the car and garage remotes to the outside of the sling bag. 

Problem solved.

In my case, due to the design of the Tomtoc sling, I ended up trying more than one configuration. In the end I bought three small metal carabiner-like things that screw closed, at Mountain Equipment Coop.


They are quite small and don't clutter up the sling. They provide really good anchor points: one on each end of the sling serving as the anchor point for the anti-drift leash or to hang the sling on a hook in the closet, and one attached to the sling strap where I clip the remotes.


I've been using this set up for a little over a month. 

It's taken a little McGyvering as I mentioned, some getting used to, and some trial and error, but it is turning out really well. I like that the Tomtoc is comfortable, and that my pockets are more often than not empty. It's a better look for the pants, and it just feels nicer.

It's going to be really handy for our fall adventures.

And yes, the ORANGE sling is coming along too. We have some really interesting hikes planned, including the Caminito del Rey, and snacks and water will go in that other sling. 

Wednesday, June 21, 2023

Cool tools!

I am not, definitely not, absolutely not, a "tool guy".

My father's lifelong hobby was woodworking. He was really good at it. My sisters and I have some serious furniture our dad created for us. Our dining room table, stunning, solid, refined, and generous, with cherry, oak, and ebony hardwoods, exotic veneers, and exquisite and rare inlays. Truly special. My father's legacy literally lives on in our daily lives. That is the true meaning of treasure. 

I inherited some of his tools, but only the everyday tools, and only those I might have an actual use for. A hammer my dad owned for ever. Some vice grips. A laser level, a Vernier caliper, a few hand power tools... basically very little. 

The serious tools (table saws, drill press, lathes, planers...) went to my brother-in-law who could actually use them.

That doesn't mean that I don't have an appreciation for great innovative tools that meet a real need. Tools that fit their purpose to perfection. Tools that take very little room, yet are reliably there when they are needed, but otherwise, are all but invisible. That is my definition of cool tools. 

My Leatherman Wave fits the bill. 

But move over Leatherman, I have two other even more amazing and mind-blowing examples to share. If you want either of these, read on, the links you need are at the bottom. To get there, just read on and allow your interest to be piqued along the way.

The Brompton tool

I'll start here, because I own this tool, and it is a true joy to put to use.

This tool has all the components needed to all but completely disassemble a Brompton bicycle.

With the Brompton tool you can

  • Adjust, or completely remove, the saddle;
  • Remove the wheels;
  • Remove the tires;
  • Remove the grips
  • Adjust or completely disassemble the controls
    • Break levers, calipers
    • Gear shifters
    • Cabling
  • Remove the handlebars
  • Remove the mudguards
  • Remove or replace the easy wheels
  • ...
This list literally goes on, and on. If you were to use the tool to remove every component possible, all you would be left with would be the frame and the cranks.

Like everything about the Brompton, the tool kit is highly, highly engineered and exquisitely mated to the bike. 

How does it disappear when not in use?


It lives in the front section of the frame.


When the bike is folded it is obvious and easy to see, but only if you know where to look, and what to look for. The wrench does double duty as a handy way to pull the tool out of hiding. 


If you didn't know anything about it, for instance you bought a second-hand Brompton and didn't know about the tool, it might take you quite a while, perhaps weeks, or even months, to find it and figure out what it is, what it does.


Basically it's a ratchet driver that is also a wrench, with all the right bits for the ratchet, and two tire levers that also serve as wrenches.


The MetMo Pocket Driver

I mention this amazing tool second, because I don't actually own one.

You see, this is one of those fascinating things about the world we live in. In this case it's Kickstarter. A platform that allows smart people with brilliant ideas to bring their inventions to life.

There is something enticing about this tool. It's similar to the Brompton tool in many respects because it's also a ratchet driver, it's incredibly compact, and also because it is highly engineered to be robust, and to perform in tricky situations. 

Another thing the Brompton, the MetMo Pocket Driver, and Brompton tool have in common? They are designed and produced in the U.K. Wow!

Because of its form factor, the MetMo Pocket Driver fits in your drawer, in your pocket, in your glove compartment or console, in your purse, even your evening bag, in your saddlebag, top case, handlebar bag, in your backpack, or your travel sling. Super easy for it to be right there whenever there's a loose screw, a stuck bolt, or a fiddly bit of gear that needs a quarter-turn, a tweak, a twist, or a twirl.

Now that I've got your attention, I'll let MetMo's arty images tell the rest of the tale. 


If you now realize that you simply can't live without one, or the other, or even both of these wonders, here are the links I promised. Have fun, and have no fear, you will have spent wisely.

Hmmmm... I forgot to mention that although MetMo reached out to me asking if I would do this, I am not compensated in any by Brompton or MetMo for this post. It's 100% motivated by my love of cool tools. 

Monday, June 12, 2023

Trashcan solutions

 We just returned from a family event in Florida.

At some point I mentioned to Mason that for many years and in multiple locations at our home in Montreal, my offices at CGI, and now at our home in Toronto, I have used trashcans as a solution to the wire mess that is inevitable with computers and network gear. 

Mason was interested to learn more, and I promised photos. Mason expressed concern that bundling power supply cabling with ethernet was not recommended due to electro-magnetic interference. I acknowledge that, but it's something I have always done, and haven't had any issues that I am aware of.  Although see below about a magnet war that destroyed some key equipment.

Sending one photo by email is fine, but multiple photos is a trickier challenge due to file size.

I thought about alternatives, and decided that a blog post could do the trick.

So here goes.

There are a number of ingredients that result in the wire mess:

  1. Power supply
    1. There are the power bars needed to plug in all the devices. Sometimes the power connection is direct (for instance with a Mac computer) more often the power connection is indirect and requires plugging in an AC/DC adapter.
    2. In addition to the little brick that takes up space on the power bar, the AC/DC adapter has a long-ish cable, often with a micro USB connection that plugs into the device. That is the first source of excess wiring. Modems, routers, bridges, they each have a little brick and excess micro USB wiring.
  2. Network cabling
    1. Modems, routers, computers, printers, microphones, and other devices that depend on rapid and voluminous data use RJ45 ethernet network cables, as well as phone or optical cabling. While it is possible to make custom length cables, I have never bothered, you will soon see why.
    2. Often the ethernet cable runs to and from from the network components are short, in the case of my network gear, maybe from mere inches to a foot or three max. That means more excess wiring, depending on the length of the ethernet cables.
There are readily available tools you can use to tame cabling, but tie-wraps are essential.  In my most recent cable management for my sit-stand desk I installed Ikea undermount cable trays. I posted a video that you can get here. A word of warning about electro-magnetic interference that I did have though. In the video you will see that I mounted two Ikea lighting remotes next to the remote for the sit-stand desk. The Ikea remotes are held in place by strong magnets. Over time the magnetic field from the Ikea remotes destroyed both the sit-stand desk remote, and the control unit for the motorized legs. It took a lot of brainstorming with the amazing support folks at Progressive Desk to figure out what was happening. You will see in photo #1 below that the Ikea remotes are now installed on the risers for my monitors. The sit-stand desk is back to working perfectly. Hopefully the Ikea magnetic remotes aren't working on destroying anything else, like my Mac.

So here is what I do.

  1. I plug everything in.
  2. I use tie-wraps to route the cabling.
  3. All the excess cable gathers at a single point along with all the DC power supply cables. From that point, the cables are gathered and from there descend into a trashcan (most recently I used a Muji storage cube). The excess ethernet cable takes the same path. All the power bars currently there are four, and all the AC/DC adapters live in the trashcan.
  4. That's it. Wire mess tamed. Easy-peasy.
Here are the photos. In the first photo if you look carefully you will see 7 cables on the desktop in this order: lightning cable, micro USB cable, female USB, female USB, lightning cable, USBC, lightning cable. I can pull on each of those cables to extend them. The reason that works is that you can see in photo #5 that the excess cable simply falls in a controlled way into a trashcan. The other cable that falls into the trashcan is the main power cable that connects to the power bar that sits in the Ikea cable management tray. As my sit-stand desk rises and lowers, the cables lower into the trashcan, or rise up, as the case may be. Kind of cool, very functional, very handy.

Photo #1
Photo #2

Photo #3

Photo #4

Photo #5

Photo #6

Photo #7

Photo #8


The copyright in all text and photographs, except as noted, belongs to David Masse.