Tuesday, April 30, 2013

Project report: Installing ScooterWest LED running lights and turn indicators on a 2010 Vespa GTS 300 i.e. Super

The Vespa GTS 300 i.e. Super is manufactured by Piaggio.

It's an iconic, high-end vehicle.  Its price reflects that.  For the price of a Vespa GTS or GTV you can get a very nice 650cc or 750cc motorcycle.

As with many things Italian, some choices the manufacturer makes leave you scratching your head.

My first Vespa was an LX 150.  From a visibility perspective, the LX has a great feature: dual running lights on the leg shield.  Those lights, along with the headlight, form a triangle pattern.
I remember when the commuter trains adopted the three-headlight triangular pattern.  It seemed to me that it made the approaching train unmistakable.  It might be because triangles don't normally occur much in nature and the human eye causes them to stand out more.  I Googled in an attempt to find some validation for the safety reasons for triangles.  Clearly the triangle dominates safety signalling.  But I came up dry.  Intuitively it seems to make sense.  At least it does to me.

The Vespa GTS has the same leg shield design as the LX.  It has the headset-mounted headlight, and the two light housings lower down on the leg shield.  Inexplicably, Piaggio only uses the leg shield light housings for turn indicators.  No running lights on the GTS.
Some GTS's have a light in the horncast, but it seems to be only decorative, and doesn't really make the scooter any more visible.

ScooterWest in San Diego has come to the rescue with an LED running light kit that is, by far, the easiest Vespa modification I have done to date.

The kit includes the wiring harness, a modular plug that snaps into the GTS alarm connector that lies waiting just inside the left knee pad panel, new sockets that snap into the existing turn indicator housings, and the LED combination amber and white bulbs.
The first step to doing this modification is to turn the garage into a scooter maintenance bay.  I have one of those multi-folding aluminum ladders that makes a great work bench.
I try to limit my choice of tools to those that I have in the roll bag tool case that lives in my underseat storage compartment (the one Vespa owners call the "pet carrier" owing to the ridiculous "no pets" warning sticker in the compartment).
The next step is to remove the left knee pad cover...
... the horncast....
... and the left and right turn indicator housings...
All these steps require nothing more than a Phillips screwdriver.

All you need to do is plug the ScooterWest wiring harness into the GTS alarm connector.
 
The next bit is simply removing the existing lamp sockets from the turn indicator housings, fishing the left and right LED sockets and bulbs through the leg shield and to the turn indicator housings, plugging the new sockets into the housings, and buttoning the lights, horncast and knee pad back up.

The only challenge I faced is that there was simply no way to thread the right-hand LED lamp and socket through from the horn enclosure to the right-hand turn indicator opening.  Removing the LED bulb from the socket didn't help.  Man, is it tight inside that leg shield.  The solution was to remove the glove compartment.  It was no big deal, because other modifications that were underway necessitated removing the glove compartment anyway.
And voilà!  Safety modification No. 1 up and running beautifully.
When you flick on the turn indicator, the running light switches off, and the amber LED turn indicator flashes.  When you cancel the turn indicator, the running light comes back on.  Exactly like the running lights on the 1990 Miata I used to own, pre-Vespas.

If my project report leaves anything to be desired, consider this: ScooterWest does not send instructions with the running light kit. What they do offer is a link to a YouTube video demonstrating the installation steps.

Everyone who cares about being seen by oncoming traffic when they ride their Vespa GTS or GTV should do this modification.

End of story.

Sunday, April 28, 2013

Weekend find

Every now and then I come across Vespa-themed things that serve to underscore just how iconic the Vespa truly is.

In this case, a Vespa pizza cutter.

The interesting thing about this particular item, is that it seems to be patterned on the Vespa PX.

If you see the "P" as standing for "pizza", and the "X" as meaning "cut", it all makes sense.  The Vespa PX is perfectly suited to being made into a pizza cutter.

No, I didn't buy it.  When I eat pizza, it's delivery, and thoughtfully pre-cut and ready to eat.

Thursday, April 25, 2013

Can commuting be blissful?

Grey skies, windy weather, mercury hovering at 0C, not a great recipe for a blissful commute, right?

And yet you'd be wrong; very, very wrong.

How can that be?

Imagine you're me. 

Riding the slow route to the office.  The lake shore to my right, following a curving and twisting ribbon of asphalt on a Vespa that glides effortlessly along.  I'm snug in my riding gear, with only chilled hands to complain about.

Thanks to my Sena Bluetooth system, my iPhone sits in its RAM cradle beaming a steady stream of comforting jazz that provides the perfect soundtrack for my morning commute.

There is little or no hustle and bustle on the slow route downtown.

Quiet morning rituals unfold in successive scenes of school buses picking up kids; people bundled up, waiting for their buses; dogs walking their owners; ducks bobbing close to shore in the frigid water; folks chatting on street corners.  Yo Yo Ma and the late Stéphane Grappelli provide a delightful, jazzy string rendition of Sweet Lorraine, while a thin band of bright sky on the eastern horizon hints at the sunny afternoon the weatherman promised.

I am quite literally transported by the sights and sounds of my morning commute and effortlessly and delightfully making my way to the office.

This is why I suffer the long winter anxiously waiting for the scooter commuting season to begin, and why I savour the very last days of the season before the first snowfall condemns me to my four-wheeled cage.

Sunday, April 21, 2013

Geezers and gaskets

Some people get cranky as they age.  The crankier they get, the more they are prone to blow a gasket.

Vespas are anti-aging machines.  Nothing makes me feel more alive, or younger in spirit, than going for a ride.  Any ride.  As long as I can ride, I'll be able to resist blowing gaskets.

Speaking of riding, this riding season has been off to a painfully slow and fitful start.  Full of great promise with a nice new brawny bike, but the law of averages dictates time in the pits adding my safety gear.  The stuff I feel naked without.  Horns, lights, power outlets...

And then there's the freaking weather.  When the bike can be ridden, in between modifications, the weather turns nasty.

So when last Thursday rolled around, and the front end of the bike was buttoned back up, and the back-end work had not begun, and the weatherman was only vaguely threatening rain, I dared a commute.

Ahhhhhh! That old blissful feeling.

I took the slow lakeshore route.  It had been five months since I last took these now-familiar roads.  I felt like I was re-connecting with old dear friends.  It was a great commute.

For the evening commute, I couldn't resist the expressway.  I just love the way the 300 eats up the Mountain street on-ramp to the 720 westbound.  Sweeping effortlessly into the left hand lane, hitting the ramp down to the straight flat stretch of the Turcotte Yards and then cruising in the fast lane for once, avoiding the horrible ruts in the right lane before the Ville St-Pierre underpass... pure joy.

When the joyride came to an end at the St-Charles exit, it was nice to sit in the saddle waiting for the green light.

I was happy and the Vespa seemed much more virile, more motorcycle-like.  Purring like a tiger.  Downright growly.

On quiet Beaconsfield boulevard, I began to suspect that the bike was too growly.

Once in the garage, I hit the engine cut-off, switched off the ignition, took off my helmet, and plucked out my earplugs.  I had a sneaking suspicion.

I reached down, flicked the ignition back on, snapped off the kill switch, and hit the starter.

Damn!!! The unmistakably irritating, worrisome sound of an exhaust gasket well on its way to blowing.  The source of the formerly pleasant growl.  At least it wasn't totally blown.

I knew I had to get to my trusty Vespa dealer: Alex Berthiaume & Fils.  Their tiny shop is on De La Roche street, about one-and-a-half blocks north of Lafontaine Park, on the Plateau.  It's about a one hour ride from the house if you take surface streets.

Could a Vespa GTS 300 i.e. Super limp that far with a failing exhaust gasket?  That's a question I couldn't answer.  I called the dealer's service department.

"If it was my Vespa, I'd put it on a flatbed truck to get it here" came the un-reassuring suggestion.

I wanted a second opinion; one I could bet my new bike on.  Modern Vespa to the rescue.

In no time at all, some of the most knowledgeable Vespa experts in the world chimed in, including resident curmudgeon and all-knowing Vespa guru Jim Crowther, and Ken Wilson.  Ken blew an exhaust gasket on the 2012 Cannonball.  Jim did some motel parking lot magic and jury-rigged the existing exhaust gasket for him.  At last word that fix was still holding, five thousand miles later.

Ken is inspirational.  Check out some of Ken's exploits on right side of the page.  The cross-Egypt challenge last year?  That was Ken.

Bolstered by the advice from MVers, I rode to the dealer with as light a hand on the throttle as I could manage. I didn't put my earplugs in so I could listen for changes in the sound of the exhaust. 

Towards the end I could tell that the failure was more pronounced but likely still not 100%. 

I finally pulled into the alley behind the dealership where the service department is located.  It was 8:45 a.m. and I was third in line for service.

I met Phil who was also waiting for the shop to open at 10:00 a.m. (no appointments on Saturdays - so first come first served).

Moments later, this maniac comes literally roaring into the alley on a silver GTS 300.  He was flying!  And when I say flying, I mean FLYING!  The source of the roar was an after-market muffler that sounded three times worse than mine.  The crazy rider blew past us, slammed on the rear brake, and skidded into a parking spot pretty much like that stunt rider in the opening credits to the French movie Taxi.

He pulled off his helmet, beamed a huge smile, and I then recognized the 'crazy maniac' as the dealership's affable sales manager, Paul. 

He recognized me, walked over, admired my new bike, told me how much I am going to love it, and asked me what it was in for. When I told him, he said "Ya, me too, it blew yesterday, no big deal" with the same huge grin, before disappearing through the back door to the shop. 

Needless to say I felt like a ninny for having coddled my GTS on the ride in. 

As the minutes ticked on, and the definitely unseasonable morning chill had Phil and I striving to extract heat from the April sun, more and more riders pulled up for Saturday morning moto service.

The scooter contingent, myself included, were almost all well-heeled, silver-haired gentlemen... all except Phil.  Not that Phil is not a perfect gentlemen, but he's way too young to have grey hair.  'Geezers on two wheels!' I thought to myself.  And here I thought I was setting a trend.  Turns out I may be more a camp-follower than a trend-setter!

As for the motorcycle set who were waiting for service, well let's just say that they kept to themselves.  You needed at least one serious tattoo and an earring to fit in there.  Demerit points for a full-face helmet and armored gear.

When the guys opened the service bay at 10:00 a.m. sharp, they wasted no time taking the first three bikes, mine included. 

An hour and a half later (just enough time to grab breakfast at a nice cosy neighborhood diner with Phil), and $80 less in my wallet (which I thought was reasonable and was happy to pay), I was on my way with my bike. 

It sure was nice to have my tiger back to purring rather than growling. 

Even the 2C weather, dark threatening clouds, a stiff, full-on, gusty wind blowing eastward, and a snow squall on the return ride, couldn't dampen my enthusiasm. 

Spending Saturday morning at a moto dealership, having breakfast with a fellow Vespa addict, getting my Vespa 300 back good as new, makes a blown gasket nearly worthwhile.

Wednesday, April 17, 2013

ScootCommute's Believe it, or Not!

It may not look like it, but I really do know what I'm doing.

A careful eagle-eyed observer will notice that I've set up a direct feed (both positive and negative) straight from the battery to a terminal strip. The terminal strip gives me six pairs of positive and negative feeds direct from the battery.

From there, I have a 25 amp fused circuit going to the relay that controls the Stebel air horn, and a 10 amp fused circuit controlled by a relay actuated by the ignition, going to dual 12 V outlets that will soon be installed.  I tested the horn and almost knocked my hearing out.

I've also got LED running lights and turn signals up and running.

And this is how I am spending my evenings. It's also the reason I'm not spending my days riding.

For those of you who are interested in doing some of this stuff yourselves, no worries because I'll be posting detailed project reports for each of the modifications, as has been my habit in the past.

Man, if only I had been riding this morning instead of caging it to work.  I spent an hour-and-a-half snarled in traffic, a scant mile or two from the office.  All because of a bomb scare at a key downtown subway hub station.  I would have filtered out of that mess in minutes, not hours, on my Vespa.

In the wake of the Boston bombings, everyone's extra vigilant.  Can't blame them.

Sunday, April 14, 2013

Juice

Not running out of juice is almost more important than not running out of gas.

If you run out of gas, it's like an Amazing Race roadblock: "In for a hike; or in for a push".
  • In in for a hike, the Vespa rider must first park the bike as securely as possible and then go on foot looking for a suitable gasoline container and a gas station.  Once there, the rider must fill the container with gasoline, then return on foot to the scooter and refuel, before continuing on her way.
  • In in for a push, the Vespa rider must push the 300+lb bike to the nearest gas station and refuel before continuing on her way.
  • The last rider to complete this leg of the trip, may be eliminated.
OK, so I got carried away with the simile.

Running out of juice is a whole other level of embarrassment.

I've got two scoots, man!  And one of them (my first love, my Vespa LX 150) has now been diagnosed (by me, resident mechanic) with a case of dead battery.  The new scoot, my GTS 300 i.e. Super, has a battery that seems fine, but who knows what happens in a battery?  It's literally and figuratively a black box!

So here's my devious plan: buy a new battery for the GTS which should do the trick nicely for the foreseeable future, and drop the current GTS battery into the LX 150.  I just need to check the specs on the LX, but I'm almost 100% sure that the swap will be just fine.

While I'm doing transplants, I'm going to move the Stebel air horn and the Admore brake light and turn signal unit from the LX to the GTS.  No one who has responded to my ad seems to care about my mods anyway.

Move the heated grips you say?  No thanks.  I still have the OEM grips, but it would be such a chore that I think I'll pass.

There's a fresh Vespa GTS modification that's also in the works.  I ordered the parts from ScooterWest.com and I opted for cheap shipping but, bless their hearts, ScooterWest upgraded to UPS shipping for free.  Ordered on a Monday afternoon, shipped from San Diego, and delivered in Montreal on Wednesday. Two days!!! Wow that's stellar service!!

I'll have more to say about that farkle-y mod, and as well the addition of twin 12 volt outlets, but why use all my dry powder on one blog post?

I guess, loyal and curious reader, that you'll have to stay tuned!

Friday, April 12, 2013

Thrilled?

Yes, Trobairitz, it turns out that there is a colour for that (I hope all the U's in colour don't offend your US sensibilities).

Why?  Because I found a emotional colour wheel, and thrilled is a colour.
The nerd in me can't stop there.
Since I am colour-blind, I look at thrilled, and I think "...red...?" whereas green is the obvious right answer.

But am I green with envy? Tickled pink is closer.  Flushed with pride? That would be redder than pink, but closer still to the truth.

So what is the value of the colour wheel of emotion?  Well, it gets blue right, it seems.  Although, 99.99% of the time the blues lift my spirit.

The prevailing colour sentiment right this minute is white.  Friggin' white.
Really it should be yellow for daffodils.

Oh well, I plan to spend some quality time in the garage this weekend adding some white to my black GTS.  Details to follow.

TTFN!

Thursday, April 11, 2013

First commute

Today was my first commute of the season, and the first commute on my GTS 300.

I don't have any pictures to post, so I'll just share my impressions in point form:
  • This Vespa feels so substantial compared to the LX 150.  When I take it off the centre stand it drops down onto its supension like a big cat landing on its feet.  The 150 just came off the centre stand and stood there, without making a statement.
  • The throttle is twitchy.  Twist it too hard and the bike leaps forward.  Wow!
  • The seating is more comfortable for my 6 ft frame (not that the LX 150 wasn't comfortable too).  Ergonomically, Vespas are awesome.  Beautiful and functional.  Nice combination.
  • I'm no longer a stranger in a strange land on the expressway.  I can more than hold my own in any lane I choose. 
  • The top case is very spacious.  Space is the ultimate luxury.
  • The dual hydraulic disc brakes are... AWESOME!!!  Two fingers on the rear brake gives me full control.  Two fingers added on the front brake and I've got total braking capacity.  Silky smooth is what comes to mind.
  • I still don't have GPS mounted (no outlet, no RAM mounts installed) so I don't really know how fast my beast moves.  Judging on traffic flow, the 130 km/h I hit on the way home must be 120 km/h in GPS verified terms.  Time will tell.  I'm waiting for 12 volt outlets to come from Hong Kong.
  • Without front running lights, I feel just a tad invisible.  More so without my Admore brake light turn signal combo.
  • Man, I could have used heated grips this morning.  110 km/h at -1C for any length of time is.... bone chilling.  I spent five minutes in the garage at the office thawing my hands on the headlight.
  • Not having a Stebel air horn is another issue I have to address.  I hit the horn at 50 km/h to see what it's like, and it sounded like a cartoon roadrunner flipped off a coyote somewhere on another street.  Got to fix that this weekend.
  • I took off the Tucano Urbano winter apron.  I don't need it with my Tourmaster Caliber pants with the liner in. it was just way too hot.  Plus the look is a little... strange.
  • Another thing I'm missing? I still need a beeper or some kind of LED mounted on the windscreen to remind me to turn off the blinking blinkers.  GRRRRRR! Loser!
  • The greater width of the GTS really makes a big difference in sheltering from the wind.  Very nice.
  • Though the Vespa side stand is notoriously unreliable, it's kind of a cool way to dismount.  Plus bikes just look better on a side stand.  I know better than to trust it though.  One thread on Modern Vespa was titled "Side stand, you whore!"  Pretty graphic, but when a beautiful Vespa drops all by its lonesome... well you can sympathize with the person who posted that.
Overall, colour me THRILLED!!

Monday, April 8, 2013

I don't name my rides

As with any bold statement of fact, it's not quite true to say that I don't name my rides.

I swore at the earliest cars we owned, calling them all sorts of unmentionable names, mostly when they refused to start on a particularly loathsome winter day or night.

But I didn't really name any of our cars in the way that some folks name their vehicles.  Not even the 1976 midnight blue and camel interior Mustang we were so proud to drive, and not even the 1990 mid-life-crisis red Miata I owned from 1993 to 2012.

I did kind-of name my Vespa LX 150 though. I was trying to get up a sidewalk ramp to get to a better place to snap a picture and the centre stand hit the curb, amputating the wing on the right leg of the stand. Then and there I decided to call the scoot "peg leg". I may have mentioned it in a blog post at the time, and I don't think I actually ever uttered the name, or told anyone. So it doesn't really count.

What I do indulge in, is putting Modern Vespa stickers on the bike to proclaim my allegiance to the Modern Vespa forum. There is now one on the legshield at the front, and one on the topcase at the back.  The MV stickers look like a country identification sticker.  MV is a country.  Ask any of the other citizens.  And I don't mean the democratic republic of Moldavia (which is "MDA").  I have an MV sticker on my helmet too.  And I have one on my Civic.

This time, as I threatened, I have added QR codes linking to the Welcome page of this blog.
We'll see if anyone notices and actually comes to the blog from my bike.

Friday, April 5, 2013

Hmmm... a collection?

No, no, no, no, no...

There is no collection beginning.  The LX 150 is for sale.  It needs a new home.

In the meantime, the garage is sure looking good.

Thursday, April 4, 2013

A new day, a new season, a new ride

I woke to blue skies, sun streaming through our bedroom window, and a return to more seasonal temperatures.

Many of you know that I have been looking for a new bike.

Today I got exactly what I wanted.
As you can see my new Vespa is nicely equipped with a spacious top case, crash bars, and a Tucano Urbano winter commuting apron.  The pictures are not great, I snapped them with my iPhone once I had parked in the garage at work.  So soon in fact that the Vespa was temporarily on its side stand.  Minutes later it was on the much more trustworthy centre stand.

This bike is the most capable bike in Vespa history.

It is still the perfectly nimble bike more than suited for my suburban to urban commuter needs, but it also has the grunt it takes to ride long distances in the company of any cruising or adventure  motorcycle.

Don't misunderstand. My Vespa LX 150 is also perfectly suited for my commute downtown.  It has also proven that it can handle doing the commute on expressways as well as surface streets.

How will the new bike change things in that regard?

The GTS 300 is a few inches longer, a few inches wider, perhaps a little taller, and adds some great features, including larger wheels, dual hydraulic disc brakes, fuel injection, liquid cooling, more weight, and a substantially larger engine (278cc vs 150cc).

Piaggio rates the top speed of the LX 150 at 95 km/h and the GTS 300 at 129 km/h.  My experience is that on the expressway my LX does between 100 and 107 km/h depending on headwinds and tailwinds.   When I drive my car on expressways I limit my speed to 118 km/h and that's where I set the cruise control.  The GTS has the capability to match that performance.

In the coming weeks I promise to share with you how the new bike changes my commuting experience.

Saturday, March 30, 2013

Spring

Winter finally seems to be losing its grip.

As the seasons enter their transition, so do I.

For what seems like months now, I am ever so slowly shifting from my nimble red Vespa LX150, to a nice brawny Vespa GTS 300 i.e. Super.  I have my current bike for sale, and am patiently waiting to get my hands on my new bike.

The seller is now ready to sell (having found a new bike for himself), I am ready to buy, and the dealer who will act as the go between to accommodate the sale (it's a sales tax issue - isn't it always?), will be ready to see us this week.

In the meantime, my Vespa is begging me to take it out.  Which I would have done today since it's a glorious sunny day, but the battery is on its last legs.

I can't sell it with a dying battery, so I went to a motorsports dealer who is close by, and who does sell Vespas.  I thought I'd jump in, grab a new battery, install it either today or tomorrow, and go out for an inaugural ride.

This little cat was sitting out front.  I couldn't resist taking a picture.
I wonder who did that paint job.

I went to the parts counter, the guy there searched way too long in a bunch of catalogs, couldn't seem to find the right catalogue with Vespa parts, called a colleague at a sister dealership, and then declared that the battery he hauled out of the inventory was the right one.

Except it didn't seem right to me, and, to be honest, I just don't trust their Vespa chops.  The capper was that he needed to add acid, then put the battery on a charger for what he said was 20 to 30 minutes, which seemed implausibly short to me.  I was timing out.  I left empty-handed, cursing under my breath.

In the end, here I sit, as the spring sun toasts my jeans through the family room window.  What I really want is some quality saddle time.

Curses.

Tuesday, March 5, 2013

The ultimate word on tie-downs

When I mentioned a while back that my Scouting past influenced my outlook on securing gear, I may have understated how seriously I take the art of tying stuff up.

The more I think of this, the more I feel the need to come totally clean on this topic.

Here is a mini-encyclopedic post on the skills and tools in my quiver of rope tricks. By no means does it cover all the bases, all techniques, or all skill sets.

Serious boaters and mountaineers will be disappointed, you have been warned.

It's difficult to figure out how to approach this topic so bear with me here.

I've decided to start with the cords, ropes and webbing I keep handy ("cordage"), then move on to the knots I use, and finish off with what I call tools, which includes specialized tie-downs like ROK straps, and fiendishly clever tensioning devices.

Cordage

           15' Webbed tow rope - 10,000 lbs breaking strength
           15' 3/8" marine dock line - 4,700 lbs breaking strength

I keep these ropes in the trunk of our car.  They don't get a lot of use, but, when you need them, it's sure nice to have them.  Like over Christmas when we got 45cm of snow.  A record dump, even for the Great White North.  Enough snow for my son's Acura to get well and truly mired.  What to do?

You pull up, pop the little cover hatch off the front bumper of your BMW X3 all-wheel drive, screw in the rescue hook, fetch the tow rope out of the trunk, hook it up, and haul that Acura free, that's what you do!

           Four 25' lengths of 550 paracord - 550 lbs breaking strength

It's called paracord because it was developed for use in parachutes and is a staple of military supplies.  It's light, compact, but incredibly strong.  I purchased this to have on the great 2013 moto road trip.  I'll stow it in my Vespa's pet carrier along with four Figure 9's.  Not sure what those are?  Read on.

           Web straps - 1,200 down to 275 lbs breaking strength

All the web strapping I use to tie stuff down I'll save for the tools category rather than covering it here  because it's not just strapping.  There are special dedicated tensioning devices of various designs built right into the webbing which makes each tie-down more of a special purpose device.  I'll discuss them below in more detail.

Knots

There's little point in having cordage on hand if you don't know how to tie the most important knots.

           Square knot

If there is one sure-fire preconceived notion about Scouts it's got to be about all those knots.

It may not have been the first thing I learned in my scouting career, but boy there is nothing quite like the complex mix of feelings associated with tying a simple square knot.  Why is such a simple knot the source of so much angst?  Why does such a simple knot require such deliberate care and concentration?

Maybe it's just me.  I just can't tie a simple knot without taking the time and care to make it a square knot.

Yet in all this time I still haven't figured out a way to tie a square knot without sweating it.  The worst thing is that when you get it wrong, it's a granny knot.  How embarrassing is that?  Is it the very fact that the knot is so beguilingly simple, that makes it so hard?
Granny knot
Quite aside from the frustrating and confounding nature of the simple square knot, and my compulsion to get it right, there are good reasons for using a square knot rather than a granny knot.  The square knot holds when the Granny knot slips.  Paradoxically, it's also much easier to loosen and untie the square knot.  It's therefore worth the effort to sweat the square knot.

Then again, maybe I'm the only person alive who sweats the square knot.  You think?

Here's how you do it:
Square knot

           Bowline
 
The bowline is really an important knot.  Everyone knows how to do a slip knot that is a kind of noose that tightens as you pull on it.  But what do you do when you need a loop on a rope or line that stays put, no matter how much pressure you apply?  There's really no substitute for the bowline.  It's an essential rescue knot. 

Here's what a bowline looks like.
Bowline knot

           Fisherman's knot

What do you do when you have two 25' ropes and you need a 50' rope?  Let's say that you plan to use the rope to rescue someone from a ravine or to help them up a steep slope. Or you are going to haul something up, or lower something down, and you don't want your ropes separating and the mission failing.

You might think that this is fit a job for a square knot.  And you'd be wrong.  Not secure enough.  Any knot in a rope will be the weak link.  The fisherman's knot is one knot that jams tighter as pressure is applied, while causing minimal impairment to the normal breaking strength of the rope.

The interesting thing about this knot, it that it's just two simple overhand knots, like that first knot you tie on the way to a square knot or a granny knot, or that first knot you tie when you tie your shoe laces.  The knots slip towards each other as you pull, and, as soon as they meet, jam tighter and tighter, the more pressure you apply to pull the two ropes apart, the tighter and more secure the knot becomes.  Like the square knot, the fisherman's knot, even when the stress on the line has jammed it solidly tight, comes apart fairly easily.

Here's what a fisherman's knot looks like.
Fisherman's knot

           Clove hitch

The clove hitch is a knot that I seldom use.  Having said that, when you need a clove hitch, only a clove hitch will really do.  You'll find this one handy when you need to tie a rope or a line to be secure and taught, tied to a dowel, ladder rung or limb.

Here's what a clove hitch looks like.
Clove hitch

           Surgeon's knot

This is the one knot I didn't learn as a Scout.  It's also called a butcher's knot.

It's a really useful knot when you need to tie a bundle.  For instance, you roll up a tarp, or a sleeping bag, or a carpet, or a cut of meat, and slip the rope or string around the bundle, bring the ends together to tie the knot that you hope will keep the bundle good and tight.  The granny knot is a bad choice, you know that.  The square knot is a good choice, normally, but as you tie it, it's nearly impossible not to let it slip, and the bundle won't be tight.  The surgeon's knot solves the problem.  It's simply a square knot with a single extra turn.

Here's what a surgeon's knot looks like.
Surgeon's knot
Tools

           "S" hooks

The lowly "S" hook is, well, a lowly "S" hook.  Nothing fancy.  I don't remember where I got the ones I have.  I think it may go back to when I used to haul a canoe around on the roof of my Subaru Chaser.  Very useful things that I keep in that stuff sack in the trunk.


           Carabiners

Carabiners are truly useful devices.  They're easy to find because they seem to be everywhere.  The ones I use are designed for climbing.  We're talking serious carabiners.  Don't settle for anything less.  Find a store that sells mountain climbing gear, and buy three to four of these.  They are great because they make it a snap (literally) to attach a rope or line to an anchor point, or to another rope.  They take all the tension you can apply, and they let the rope slip with little abrasion.  You can also use them to clip gear together.  They're just endlessly useful, and they save time.  I keep mine in the trunk of my car clipped on a stuff sack that has all my contingency gear in it.  It's full of stuff that's nice to have on hand when the unexpected happens.

Here's what a decent carabiner looks like.


            Rope ratchets

I have two of these.  They're another bit of gear that sits in that stuff sack.  They take a 3/8" rope.  There is a hook attached to the ratchet, and another attached to the end of the line.  If you have a load to secure, or something that needs to be held fast, you simply hook up the rope ratchet, haul on the loose end, and clickety-clickety-click that rope is as tight as... well, as tight as a tightrope, and its not going to be slipping.

Here's what a rope ratchet looks like.

           Bar harness ("Canyon Dancer")

Trailering a scooter or motorcycle can seem like a daunting prospect, unless you have the right gear.  The most essential element in that gear is a bar harness.  Many folks call them canyon dancers.  That's a name I love to hear, and love to say.  For me, for whatever reason, I always picture a wild mustang in a box canyon with a horse-whispering cowboy gently taming the rearing steed.  Calling a bar harness a canyon dancer is like calling a facial tissue a Kleenex.

What the bar harness does is to give you a tie down anchor point for each end of the handlebars, but without risking damage to the bars or controls (horn, kill switch, turn indicators, throttle, headlamp, etc.), or, in the case of a scooter, to the plastic headset.

Here's what a Canyon Dancer bar harness looks like.  You can't see it in this image, but there are loops at the ends of the straps where you hook your tie-downs.

            Powersports tie-downs

You need four of these to secure a Vespa on a trailer.  One from each rear grab rail to a floor anchor point.  And one for each end loop on the bar harness.  Once the front wheel is chocked using a motorcycle chock or a piece of 4X4, and the four tie downs are good and tight, that scooter is amazingly rock solid on the trailer.  U-Haul offers an open trailer with a full width tailgate ramp, with sturdy floor anchor points that is ideally suited for hauling motorcycles.  All you need are the appropriate tie-downs.

Here's a shot of typical motorsports tie-downs.  This image is from Lockitt.com.  They supply heated grips and I'm a customer so I'm hoping that they'll be happy to trade my use of the image for this free shameless plug.  In Canada, Canadian Tire always has this type of tie-down in stock.

           Gear tie-downs

           ROK motorcycle straps

ROK straps come very highly recommended by motorcycle tourers and adventure riders.  Since the riding season is not yet underway, they are installed in the cargo bay of our BMW X3 where they are preventing stuff we need to carry from traveling around on their own every time we turn a corner.  The secret to ROK straps is the flat bungee sections that allows you to pull the strap tight and have it maintain constant pressure on the load.  The ends have loops that let you undo the quick release buckle, pass the strap section through the Vespa grab rail, loop the strap section through the loop, and pull it tight.  You do the same thing with the other strap section.  You then load up the rear passenger seat with whatever it is you need to carry, snap the buckle closed, then pull on the loose end until the load is secure and the ROK strap is applying sufficient pressure.  If my explanation has you baffled, here's a link to a Youtube video that's worth 10,000 words.

Here is what my ROK straps look like.

                      ROK pack straps

These straps, like the larger ROK straps, have a bungy section that maintains just the right amount of tension on the load to ensure that it won't budge.  The pressure can be controlled simply by tugging on the loose end of the strap.  These are new to me, but it's easy to see that they are going to be an essential go-to item in my bag of tie-down tricks.

Here is what a ROK pack strap looks like.  Yes it looks just like its sibling, but they're much smaller, more pack-like.

           Wrapties

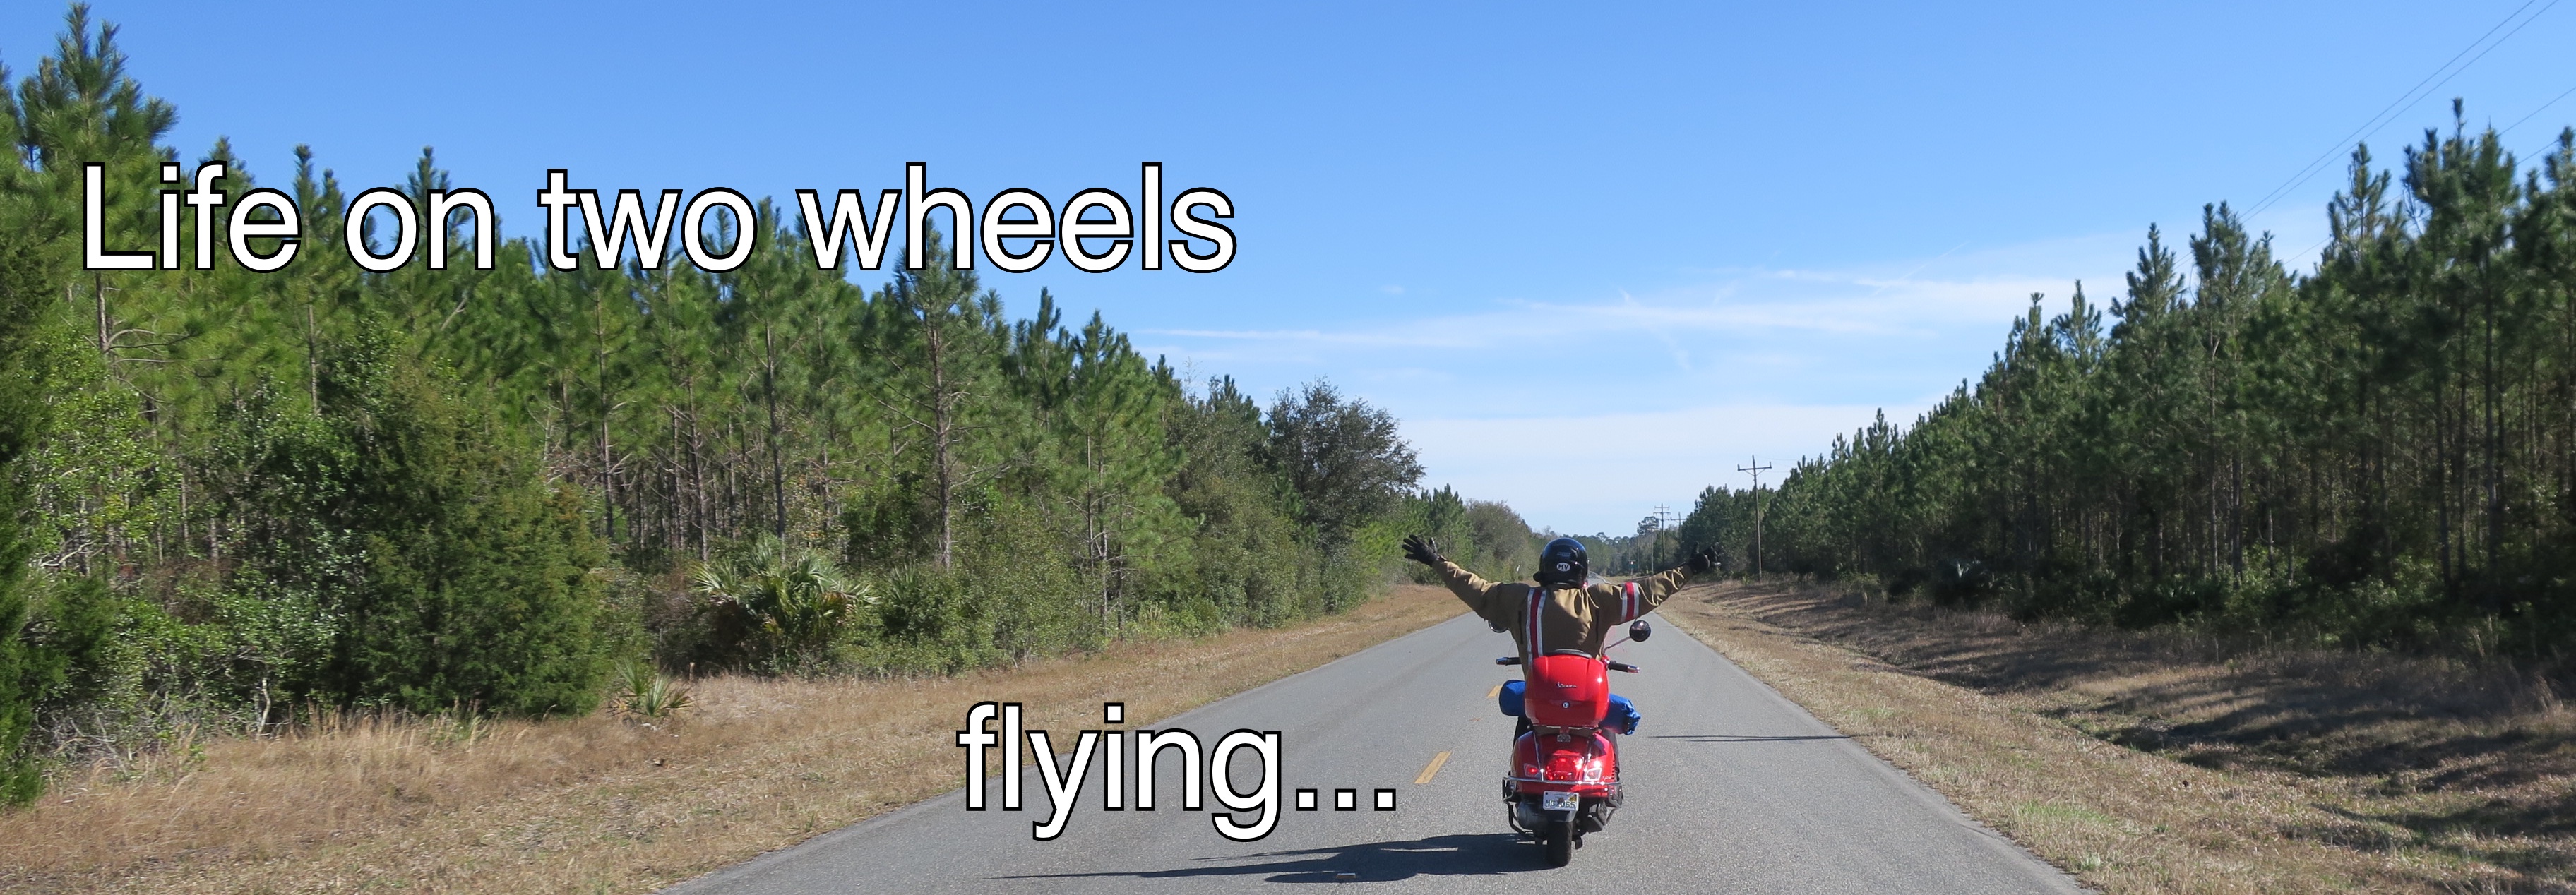
Wrapties are a 2017 invention and I am adding them here as a 2018 addition to this original post. Wrapties are an ingenious amalgam of Velcro and elastic strapping. The best way to understand what Wrapties bring to the equation is to check out episode 32 of the Life on two wheels vlog right here:

https://youtu.be/QkOKb0jI1Rg


          Sea to Summit gear straps


These straps are amazing.  They have a higher load rating than the ROK pack straps and they're much more compact.  I have a pair of these that I always have on me when I travel.  They're indispensable for things like securing my rain jacket to my camera bag when the sun comes out, or the weather warms, or securing a carry-on or computer bag to my carry-on suitcase to free up my hands and make it easier to navigate an airport or city streets.  I have even used them to attach a car battery to the back seat of my Vespa.  I can't recommend them enough.

Here is what the Sea to Summit strap looks like.


           Nite Ize Figure 9 line tensioners

This is the one bit of kit I don't actually own yet.  So far, they are evading my attempts to buy them.  I think I'll have to buy them online.

The ingenious Figure 9 has been on my radar ever since I saw one a few years back at Atmosphere.  I wasn't sure I needed them.  Now that I know I do, they appear to be made of unobtainium.

For the time being here is a link to a Youtube video that shows what they do.

EDIT: I happened to be in Portland Oregon in March of 2013 and found the Figure 9 line tensioners I needed at REI.  Here is what one looks like in the company of twenty-five feet of blue paracord:

The paracord and Figure 9 were very useful for securing my tent fly on the 2013 Blogger to Blogger Tour.  You can read all about that here.

That's it.

I figure that these tie-down skills have served me very well so far, and are likely to continue to serve me well for the foreseeable future.

Still, life well-lived is one long education.  There's undoubtedly more to learn.

Monday, March 4, 2013

Call me crazy!


I'm toying with the idea of putting a Quick Response Code ("QR code") on my Vespa. Curious folks who want to know more about me, my Vespa, and our adventures could use the QR code to link to this blog.

If you're curious, give it a try.

Install a QR code scanner on your smartphone and try reading the QR code your computer screen with your smartphone. Worked like a charm on my iPhone using the ScanLife app.

Sunday, February 24, 2013

Halfway there


I'm very slow with a needle and thread. I've persevered and now I'm halfway done.

The workmanship is, well, the best I'll say is, barely adequate. I measured twice and sewed once. Yet it's obvious to me that symmetry is wanting. Still, I've achieved my goal of adding quick release buckle closures to one of my Israeli saddlebags.

I think that once I've done the other one I'm going to take them to the shoemaker and have the stitching bolstered.

Then they'll be ready for the open road.
The copyright in all text and photographs, except as noted, belongs to David Masse.